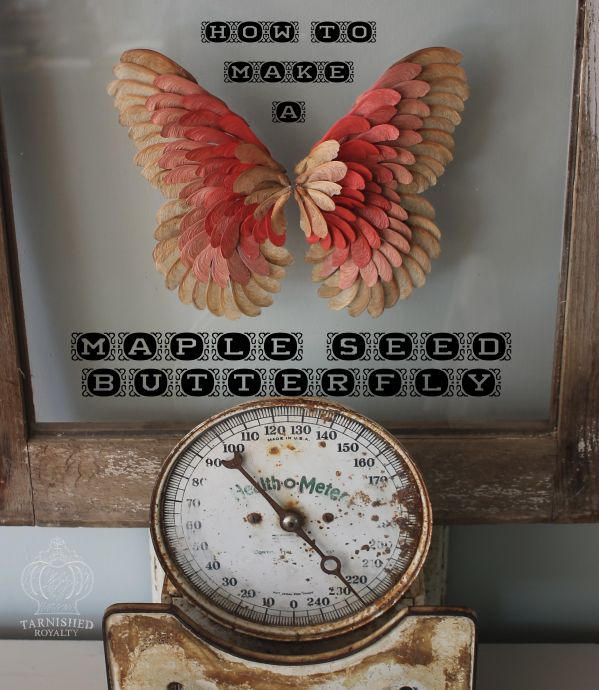
Welcome to DIY Double Dip Flip! Heather and I are excited to share our fourth project in this series where we start with an inspiration piece from either fashion or decor, then we each show you our unique take on how to use the idea to create something entirely different in decor or fashion. For this month’s inspiration I chose a Butterfly Smoking Slipper by Jon Josef.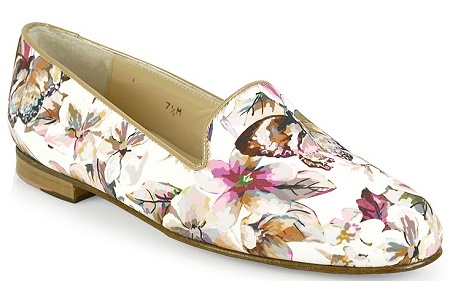
………………………………………………………………………The Shoes
I first fell in love with these adorable smoking slippers because of the style and colors. Then the butterflies jumped out at me. I had been planning on making some art work using a bunch of helicopters (a.k.a. maple seeds) I had gathered and I knew a butterfly would be the perfect subject.
And now I give you my flip for this month:


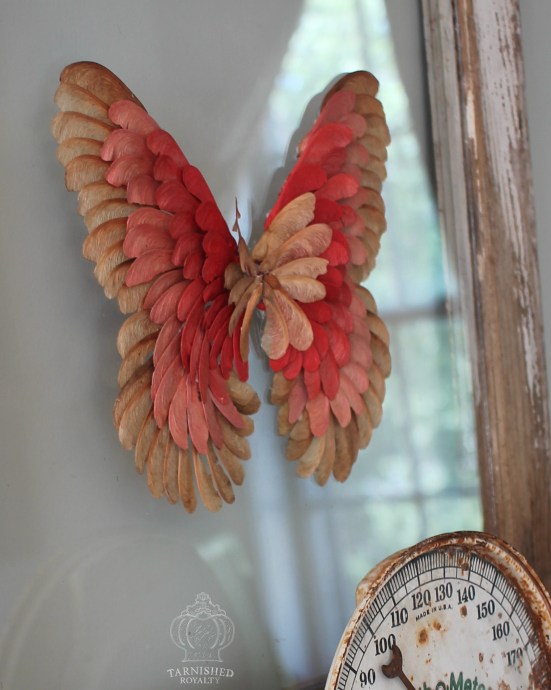
I picked up an old window at the flea market for $10. I decided on a coral color scheme and created an ombre effect by mixing the paint myself.

I love the way the helicopters look in their natural dried state, so I chose to leave them that way for the outer and inner borders of the butterfly.
Now for the how to portion of the post. To create your own maple seed butterfly art you’ll need:
1) Maple Seeds (a.k.a. helicopters)
2) Old Window or Framed Glass
3) Craft Paints
4) Glue (I used E-6000)

Spring and fall are the best times to gather maple seeds. After you collect them you’ll want to allow them to dry out. You can accelerate the drying process by laying them out in a single layer in a window sill. After a few days they will fade to the desired color.
Decide on a color scheme and buy or mix your paint. If an ombre effect is desired you can start with the darkest paint as your base and then mix in white or cream to lighten the formula each time you paint a new layer.

Draw or print out an outline of a butterfly sized to fit the frame you are using.
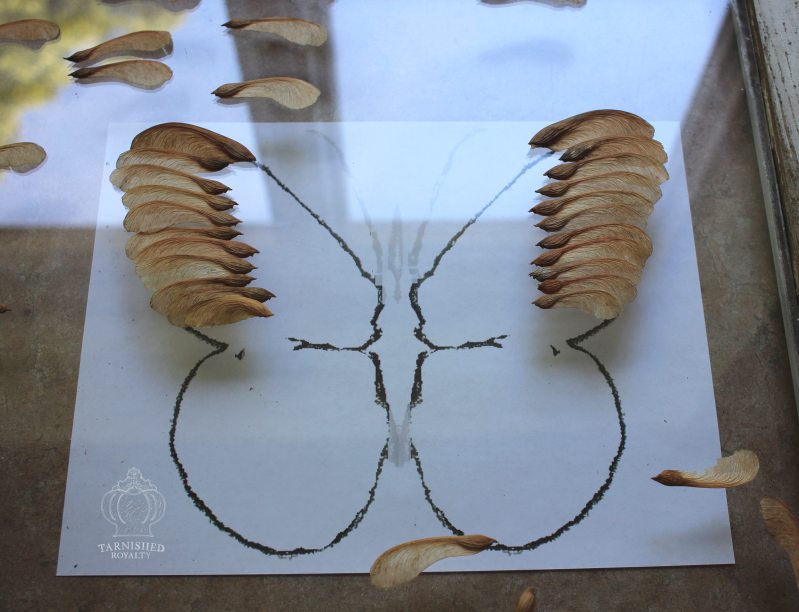
Place the drawing beneath the glass, centered within your frame. Begin gluing the helicopters around the outer edge, following the general shape of the outline as shown.
Once you have finished the outline you are ready to start on the second layer.

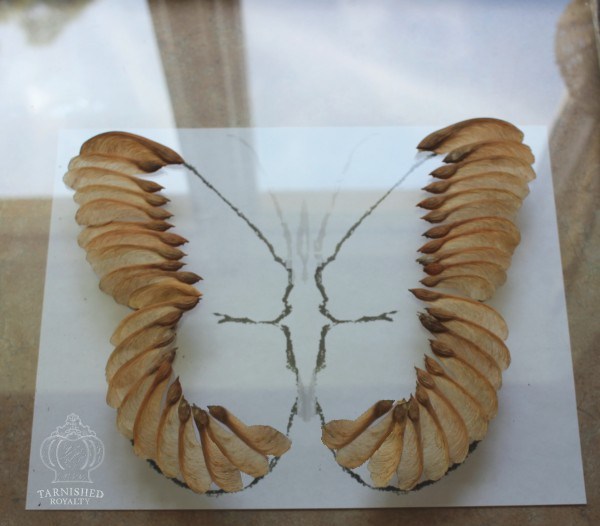
Glue the second layer, overlapping the first layer and covering the seed pod.

Continue gluing each consecutive layer in the same manner until your butterfly is complete.
Thank you so much for stopping in. Heather has her own unique project to share with you using the same sweet slippers as her inspiration.
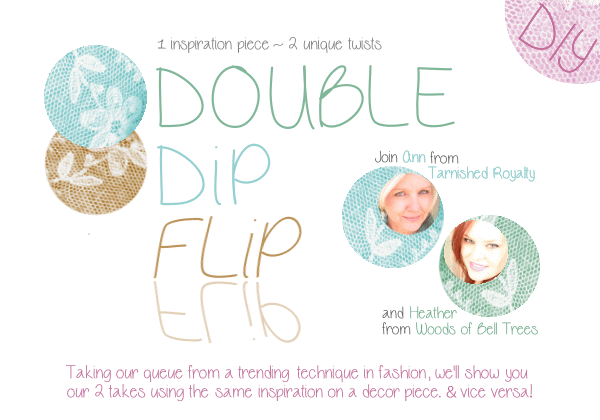
She always has something creative up her sleeve! Visit her at Woods of Bell Trees to check out her interpretation of this month’s flip!

Linking with:Shabby Art Boutique, French Country Cottage, Funky Junk Interiors

Ann, this is so neat! You are brilliant. I’m going over to visit the others now. ~Ginene
Thank you Ginene! I hope you’re having a great week!
Ann, this is so breath taking and exquisite, have never seen anything quite like your butterfly, now if I can only find a maple tree I can borrow some seeds from. I only hope I can do justice to your creation, I am so impressed with this.
The slippers are so pretty, do you wear them? I notice the size was 7 1/2 medium. They’d be so lovely with sheer, gauzy summer dress. Can hardly wait to see how I can do with my interpretation of your wonderful creation. You have such talent.
Happy weekend
Gosh JaneEllen, thank you so much for your very sweet comments. If I have inspired you that makes my day! About the slippers, unfortunately they are still on my wish list, I have yet to purchase them. But you’re right, they would be perfect with a gauzy skirt or dress. ~Ann
Beautiful. Love the why you’ve display your artwork on the window.
Thank you Susan! I hope you have a wonderful week!
BRILLIANT!!! ♥ it
Thanks so much!
such an amazing project!!!! beautifully done!!! I like using natural items for crafting-putting this one on the back burner for now:)
Hi there! Yay for natural elements! They’re free, eco-friendly and uniquely beautiful.
Very creative and unique.
Thanks for stopping by Tedi, and thank you for taking the time to comment. Have a great day!
I would have never thought to use maple seeds to make a butterfly, but it works oh so well! I am regretting the loss of our maple trees now! On the search now! Beautiful, beautiful piece Ann!
Thank you Heather! Parks are a good place to find them when they’re in season!
Absolutely outstanding project, Anne!
I’m so glad you linked up to Party Junk! I shared you on Facebook and my readers went WILD! Then again, so did I. :)
Gorgeous!
My apologies… Ann! :)
Thank you so much Donna! I’m flabbergasted!
I’m over from Funky Junk. What an adorable idea! Just Fabulous!!!
LOVE IT! My street is lined with maples,already picked up a handful when they had dropped but not enough to make this lovely butterfly.Can’t wait to get my hands on more. beautifully simple!!
Thank you so much Peg! I’m already thinking I need to collect some more. :)
Hi Ann
I found you via Donna’s Link Party and am just SO impressed with your Creativity.
You’ve got a new fan :)
<3
Pia
Thank you so much Pia for your sweet comment. I’m so glad you stopped by. Have a fabulous day!
I LOVE this. Its so beautiful and very effective.
Super job! :)
Sarah @ EDEA Smith
http://www.edea-smith.co.uk
Thank you so much Sarah! I’m so glad you stopped by. Enjoy the rest of your week!
You are AMAZING!!!! Sooo beautiful, I love the colors and can’t believe they are leaves!?! You did an incredible job!
Hugs,
Patti
You’re a doll, Patti. Thank you for the sweet comments. Hugs!
Well I am amazed! Those little helicopters are all over the place here in the fall since my next door neighbor has a huge maple tree!
I have to show this to my DIL who lives close by…I’d like us to try this!
Hi Deb! There’s no shortage of them around here in the fall either. By all means give it a try!
One of the best I’ve seen on Hometalk!! Would you expand on how you painted them. Paint brush, spray can? Thanks, can’t wait to do this
Hello Peggy! Thanks a bunch! I used a paint brush and acrylic craft paint to paint only one side of each seed. I brushed it on in a thin-medium amount, allowing a small amount of transparency (i.e. not full coverage like 2 coats would do.) Hope that helps! ~Ann
How were the seeds painted?
Hi Gayla! I used a paint brush and acrylic craft paint to paint only one side of each seed. I brushed it on in a thin-medium amount, allowing a small amount of transparency (i.e. not full coverage like 2 coats would do.) Thanks for stopping by!
This is one of the most beautiful things I’ve ever seen.
Thank you Kathy, so kind of you to say!!