I’ve had the thought for a while that I wanted to go around my house and property in search of heart shapes to photograph. A few years ago I did a similar thing by looking for and photographing cross shapes in my house and posted it on a Good Friday. So this week I got a chance to look for hearts in time for Valentine’s Day. Some of the more obvious ones I was aware of but I was surprised by a few heart shapes that I found.
This is one of a pair of French chairs that I found at the flea market several years ago. They were covered with bulky, poorly tacked on pieces of embroidery when I found them and I was thrilled to discover the heart shaped backs and (sort of) seats. The oil cloth is starting to come off and I need to decide what to do with that but I love them.
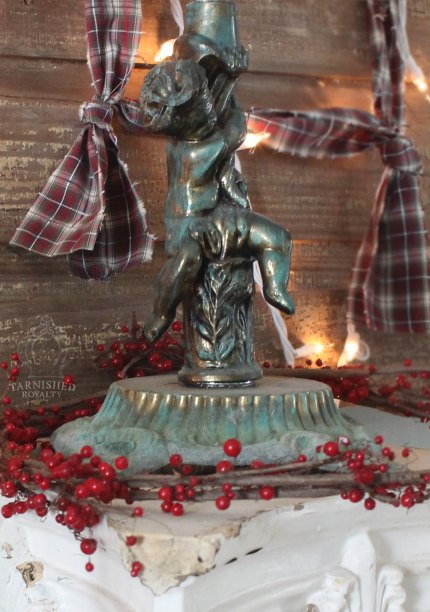
A scrolly candelabra.
The side of a sewing machine that I inherited from my mom.
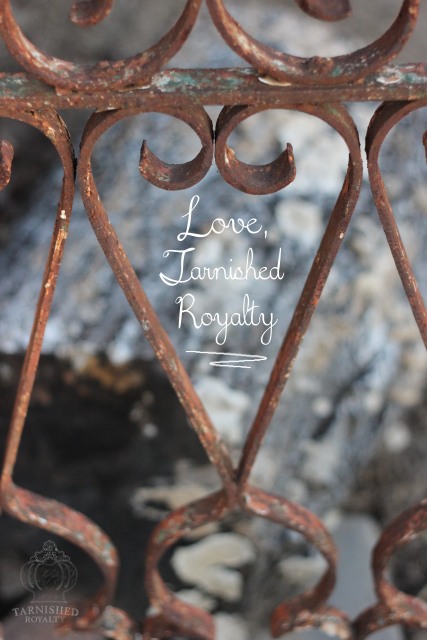
A cast iron fence piece used for garden art.
Bet you have had these heart shapes in your home at some point, too.
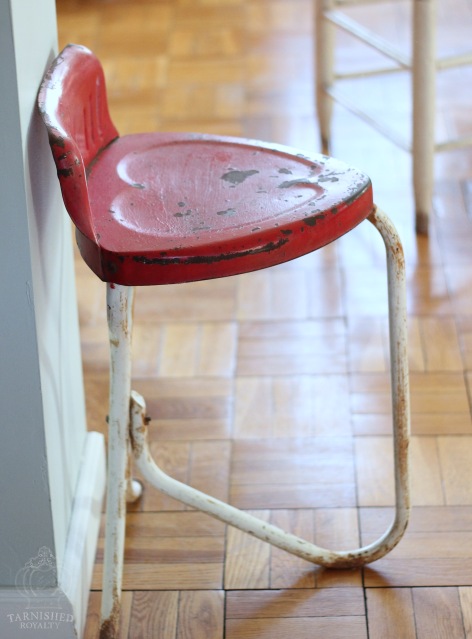
This metal stool is another flea market find. It sits between my kitchen and dining room.
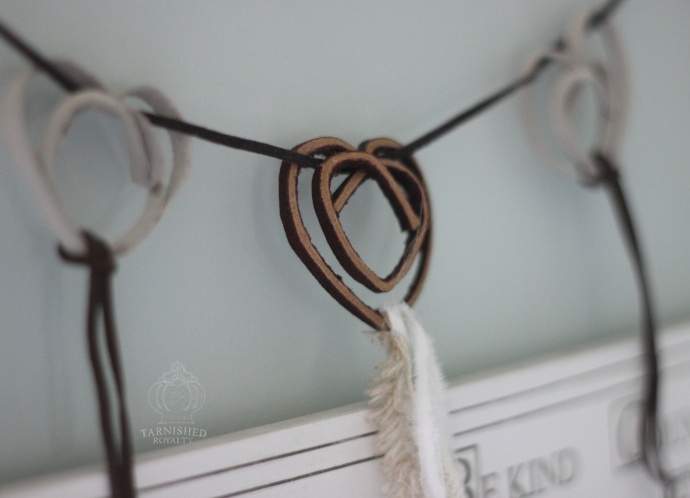
My favorite kind of crafty project are the ones that are quick and easy and inexpensive. And if I have most or all the supplies on hand already, even better. Whether you already have the supplies for this project or not, there are very few things needed. With Valentine’s Day coming up (and being a lover of seasonal decorating) I went to work thinking up a simple project to celebrate the holiday. This DIY heart garland is what I came up with.
Actually I came up with two different DIY heart garlands. It’s difficult to see the second, smaller one in this picture so I will show it again later in the post.
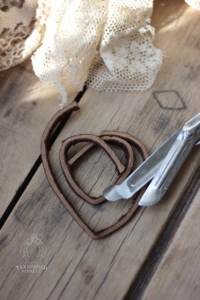
Along with wanting it to be simple, I wanted it to have an organic feel. So I dug around in my craft supplies, found a bunch of leather strips and knew they would be the perfect material to use.
And like any good hoarder crafter, I also had a bunch of neutral fabric scraps and lace that would complement the leather and soften the design.
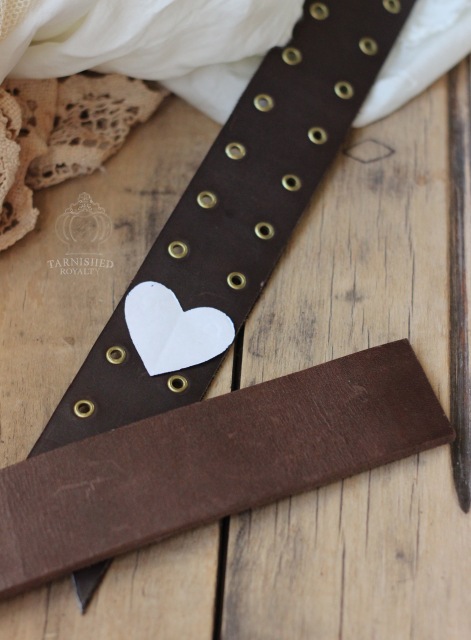
For the smaller garland I cut heart shapes out of an old leather belt. It was a little bit more work than the first one but I like the way it turned out.
The belt I used had grommets which added a nice texture and also gave me a good place to string the skinny piece of leather for the garland.
You could easily change up the design with whatever colors you like. It’s a fun project to complete in an afternoon.
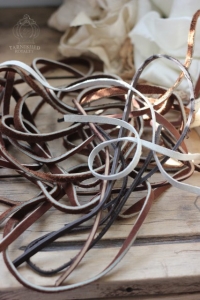
All you need to make your very own DIY heart garland is leather strips that can be found at your craft store, fabric and lace scraps, and for the smaller garland you’ll need a leather belt or leather scraps that can also be found at craft stores. You’ll also need glue (I used Loctite), scissors and a pair of pliers.
…….
Now to create. The process for the larger garland:
STEP 1: For each heart, cut two strips of leather, 7 3/8″ in length for the outer strip and 6 1/2″ in length for the inner strip. The width of my leather ranged from 1/8-3/8″.
……………….
STEP 2:Cut strips of fabric (and leather lace if desired) to desired length for the “tails”. They will be doubled over so you will want them to be twice the length to allow for that. My cut strips ranged in length from 12-20″ and in width from 1/8-1/2″. I used 2-3 per heart.
STEP 3: Find the center of each piece of leather and using your pliers pinch it to form the bottom point of the heart.
………………
STEP 4: Fold over one end of the heart and glue a little further than halfway down on the other side.
STEP 5: Allow to dry then overlap and fold over the other piece, gluing in place as shown in center picture above.
STEP 6: Once that has dried glue one end of the second (outer) strip to the first heart at the top, center.
STEP 7: Allow to dry then glue the other end in the same manner.
……………………………………….
STEP 8: Take the strips of fabric and/or leather lacing and attach each to the bottom of the heart with a slipknot.
STEP 9: For the final step, thread them onto the length of leather to complete the garland. I used 1/8 inch deerskin lace leather for the garland length, cut to approx. 5 ft. and I used the extra for some of the hearts’ “tails”.
To make the smaller garland:
STEP 1: Draw or print a heart shape in desired size (mine is approx. 1 1/2″ x 1 1/2″). Using the paper heart as a template, draw around it onto the leather to make five hearts.
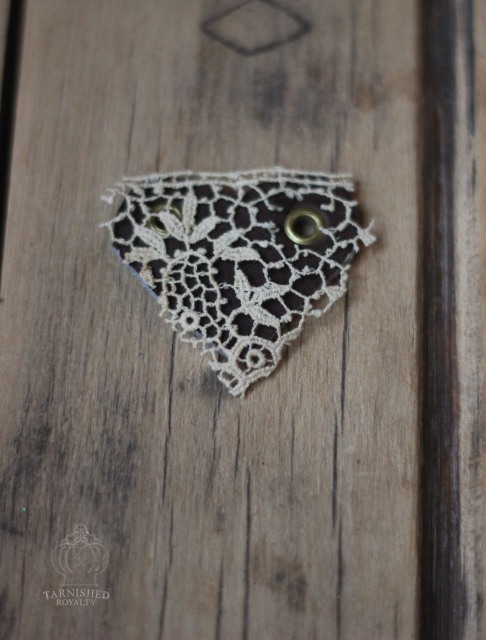
STEP 2: Cut them out using heavy duty scissors or a razor knife. Don’t worry if the edges are ragged and uneven, the lace will cover that up.
STEP 3: Decorate each heart with lace, covering entire heart or using it as a trim around the edges. Glue lace in place and trim.
STEP 4: Cut a leather lace or strip 2-3 feet long. This will be your garland base.
STEP 5: Unless you happen to have grommets in your leather hearts, you will want to attach them by punching a hole at the top of each heart. You can use a nail and hammer to do this or a leather punch. After punching a hole in each heart, attach them to the leather garland base, tying them on with small fabric strips.
Love is in the air!
As always, feel free to ask questions and please let me know if you need clarification on my instructions. :)
Be sure to check back in a few days for more Valentine-themed fun.
I hope you all had a joyful Christmas celebrating the birth of our Savior. Ours was very different this year but keeping the focus on the true meaning gave us a reason to celebrate. I was looking through my photos of doors gone by and decided to show you what my Christmas door has looked like over the years.
2006, before we had new stucco put on the house. Gray door, gray stucco. I liked the weathered look but the insurance company did not (there were chunks of it missing, showing brick underneath, considered a hazard.)
2009, same stucco, different door color, different wreath.
2014, new stucco, teal door, tweaked wreath.
2016, black door, same wreath. I wanted to re-do the wreath with red, green and plaid so it would pop against the black door but didn’t get it done. There’s always next year if we have a black door wherever we end up. Or maybe…it will be…a red door? And that would be okay too.
The house hasn’t sold and we took it off the market over the holidays. We’ll relist it some time in the next few months. Here’s to finding the beauty in 2017.
Here we are less than a week before Christmas. Not sure how we got here already. The sights and sounds are bringing me joy once again, even when my world is topsy turvy. I draw nearer to Christ and think more on the reason for the season. Just wanted to pop in and share a bit of Christmas cheer from my house to yours with a mini Christmas tour.
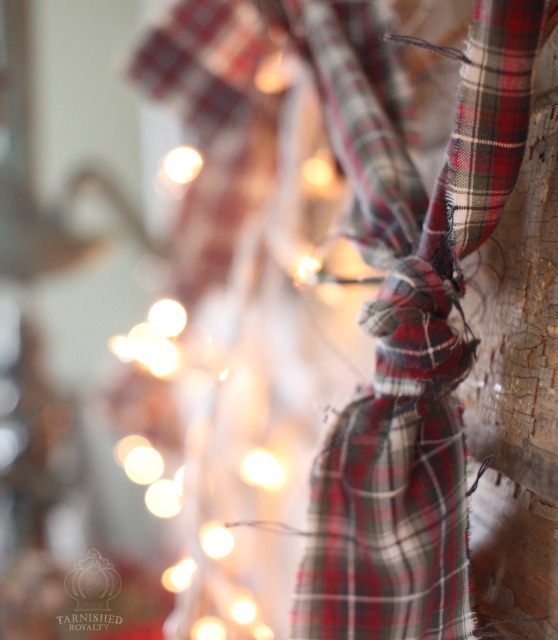
I made this plaid garland by tearing up one of my son’s old shirts.
Last year I showed you a different display on my buffet using these same black iron lantern frames and told you there was an interesting story behind them but I never told you what it was!
Well, a few years ago my husband was putting Christmas trees in the urns on the concrete columns that flank our front steps. He noticed the top of the column was crooked and straightened it. This led to him lifting it all the way off the column and looking down inside. Guess what he discovered? Yep, the black iron lantern frames, one placed inside each column. We had lived here for almost twenty years when he made the discovery. Of course we speculated that they must have been used there at one time, lighting the path. And I of course was thrilled to put them to an entirely new use as rustic indoor décor.
I tore one more strip from the old plaid shirt to give my woodland reindeer a scarf. Doesn’t he look dashing?
I took these two pictures last year and never posted them.
I would like to wish you and yours a very Merry Christmas filled with joy and good will. Gary and I are doing well and I will give an update very soon.
With Thanksgiving upon us I would like to share a unique way to incorporate natural elements into your tablescape. There’s something romantic about bringing nature indoors. And the fact that it costs next to nothing is a bonus.
I shared these pearly twiggy napkin rings a few years ago during my Girls Want Pearls series.
Very little is needed to make these:
Just gather some twigs and be sure to find some that are super skinny for threading pearls onto. If you can’t find any skinny enough, you can cheat and use brown wire for the ones that have pearls. Make five bundles of twigs and wrap with wire. Tie your twine around each bundle, spacing them approx. 1/2 inch apart. I found it easier to prepare the knots in advance and then slide the bundles in. Form the finished twine around a napkin and tie the ends together. Thread your pearls on and add a dot of glue if needed.
For your Christmas table you could mix in some sparkly beads in your color choice.
Add a natural-elements centerpiece, maybe vases full of twigs or a tray of hedge apples, pumpkins or artichokes for a cohesive look.
Hello Friends. I know I have been MIA and have not posted or visited other blogs for quite some time. My heart is heavy with some changes going on in my world. The changes are of a very personal nature and I’m not ready to divulge all the information. I would just ask that if you believe in the power of prayer, please keep my husband Gary in your prayers.
I took these pictures in November. One day I pulled in the driveway as he was leaf blowing. When he saw me he began to play the blower like a guitar. I couldn’t resist grabbing my camera and getting some shots of him. He humored me happily. That’s the kind of guy he is.
My comfort comes from the Lord and I choose joy during this holiday season. Here is a shot of the dining room buffet decorated for Christmas.
I used greenery that I cut from one of the trees on our property. The branches were covered in these cute mini pinecones.
There’s a very interesting story behind this pair of lanterns. I will share it in a future post.
I don’t know when I’ll post again, so for now I wish you a Merry Christmas filled with joy, peace and wonder.

 A scrolly candelabra.
 The side of a sewing machine that I inherited from my mom.
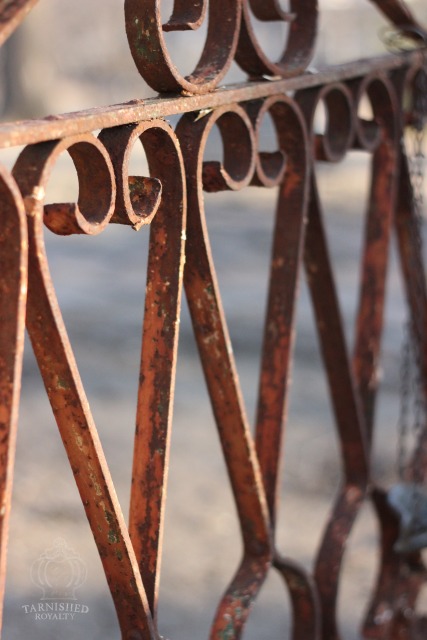 A cast iron fence piece used for garden art.