Tag Archives: flowers

Road Trip To Eureka Springs, Arkansas

Getting ready to leave on a girls’ getaway. Oh, those words have a sweet sound in my ears. The word getaway is like medicine right now and the phrase girls’ trip always puts a thrill in my heart. I can put the frustration of things not happening fast enough out of my mind and get a fresh perspective moving forward.

It’s a road trip and we’re headed south for three days in Eureka Springs, Arkansas. Blooms should be bursting forth even more there than they are here and when I return I anticipate the leafing of the trees to be in full swing. Love this time of year, don’t you? I’m taking my “good” camera and promise to share photos of my trip in a future blog post.

But for now there’s this.

magnolia_bud
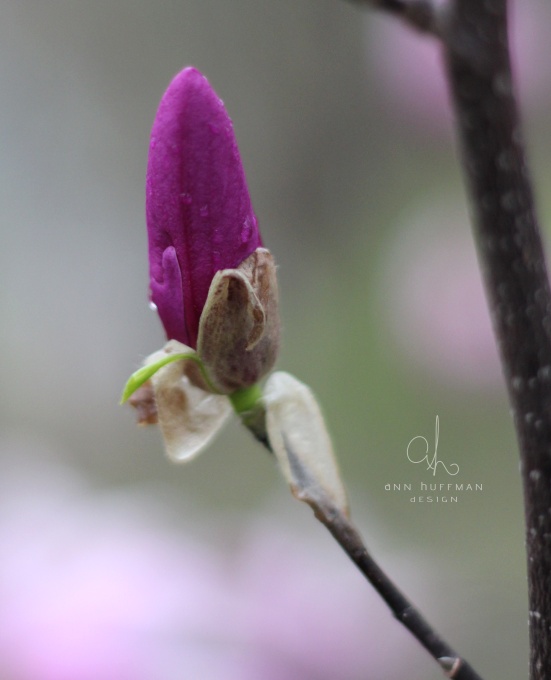
I’m happy I get to enjoy the blooms of this three year old magnolia before we move.

magnolia_bud_2

I find it interesting that the younger the bud, the more saturated the color and as it grows and unfolds it becomes a paler shade.

magnolia_bud_4

Next week I’m going to share what I’ve been working on for the past few months. I’m really excited about it and can’t wait to tell you.

I’ll be on Facebook while I’m gone and would love to connect with you there. Just click on the little “f” to come over and chat.
facebookbutton

Share Button

Ombre Vase Fillers

A few years ago I put together these ombre vase fillers for a quick spring project. With spring coming soon I thought it would be a good time to re-post this project that was originally a part of my Girls Want Pearls series. It was a lot of fun choosing the colors to use and creating a custom look using my own shading.

Are you as ready for spring as I am? I’m done with winter and to prove it I’ve got a fresh new pearl project to welcome in warmer weather when it finally gets here. Welcome to Girls Want Pearls #29!
I want to show you a super easy project with high visual impact.

You’ll need:
3 straight skinny clear vases (you can find them at most dollar stores), pearls and beads in various colors, water, and 3 flower stems.
flowervases1b
I love ombre shading! I knew I wanted to create an ombre effect with dark to light colored pearls / beads. I went to shop for the perfect combination of colors but wasn’t quite coming up with what I needed. What do you do when you can’t find what you’re looking for? You make it!
flowervases2b
I did some paint mixing with my craft paints to create 4 of the colors in my design: the cocoa brown, the bright green, and the two lighter shades of pink. I would have much prefered to buy what I needed, and I’m sure you can find the exact right colors online, but in case you can’t, or you like to dabble in paint mixing, here’s the solution I came up with. I placed a dollup of the mixed color in a small plastic container with a lid (butter tub, coffee can, etc.). I dropped in the desired amount of white pearls, put the lid on and shook them up. Then I poured them out on waxed paper and let them dry, jiggling them periodically to keep them from sticking. If you want a more translucent color, add a little water to the paint.

flowervases4

Once the pearls are dry, place them in the vase, add water and flowers. BTW, I did get lucky when it came to my flower purchase. I knew I wanted light pink tulips for this project. Any color would be lovely but that’s what I pictured. I went to Walmart and they had them! Exactly what I needed at the first place I looked! Bam!
flowervases3b
So there you have it, an inexpensive way to bring a good dose of spring to your home using pearls.

Share Button

DIY Pearl Daisies

Here’s a quick DIY project that you can do to bring flowers into your décor while you wait for spring to bring the real deal. I originally posted this DIY Pearl Daisies project as part of my 52 week series,
Girls Want Pearls.

For today’s project I raided my button stash and grabbed some pearls, wire, and twigs from the yard to create…

daisy1a
daisy1

To create the daisy I simply threaded the wire through the back of the button and, using one long continuous strand of wire, threaded pearls on and looped each petal, twisting together in the back before creating the next loop. Then I attached the flower to the twig with wire.

daisyback

You can glue on lace or burlap leaves to complete the look.

daisy2

I like the juxtaposition of the rustic twig with the fancy pearls. I placed mine in a “vase” of corroded copper pipe to give it even more of a rustic feel. The look can be easily changed up by using buttons in various styles and colors. Have fun with it!

I’m really ready for winter to be over.
I miss my bicycle.
And green grass.
And fresh air.

Only 39 days until spring!

Share Button

Simple Faux Floral Arrangements

I don’t know about you but once I take down the Christmas decorations I’m ready for spring. The house just looks and feels dreary without the twinkling lights and sparkling balls. And since it will be a few months until spring comes I like to incorporate a few dried and faux floral arrangements back into my décor.

floral_arrangements_wood_wire_cloche

I try to hold back a little and not go full on floral but I don’t like to wait until spring to add some color.

Do you?

floral_arrangements_tiny_fern

This tiny fern was gifted to me by a sweet friend and the old, framed floral needlework is a piece I found last fall at the flea market for one dollar. I love it with all its imperfections.

floral_arrangements_granite_pitcher2

These little touches remind me that spring is coming.

floral_arrangements_snapdragon2

floral_arrangements_snapdragon

And that once the cold and snow has gone there will be lush greens and vibrant color to enjoy again.

floral_arrangements_big_water_jug2

Until then, I’m content with my simple faux floral arrangements, a good book, a scented candle and if it decides to snow, a picturesque view from inside my warm home.

Share Button

Autumn Nature Walk

One of my favorite things to do with the change of seasons is walk around our property and take pictures. Autumn offers so much beauty. With camera in hand I’m on a mission to capture the essence of the season. When I step out the door, at first glance around I’m never sure there will be anything worthy of a photo. As I look at the big picture, I’m skeptical. But then I start walking around, studying the intricacies of each tiny scene. Once again, nature does not disappoint.

autumn_berries_3

autumn_berries_2

autumn_leaves_2

autumn_oak_tree
The fiery orange dots are berries that became transparent in the foreground of the photo.

autumn_flower_ladybug_beetleCritters, both real and faux.
autumn_frog

autumn_berries

autumn_rock_2bSome of the interesting rocks we have unearthed on our property.
autumn_rock_quartz

autumn_cockscomb

autumn_cockscomb_3
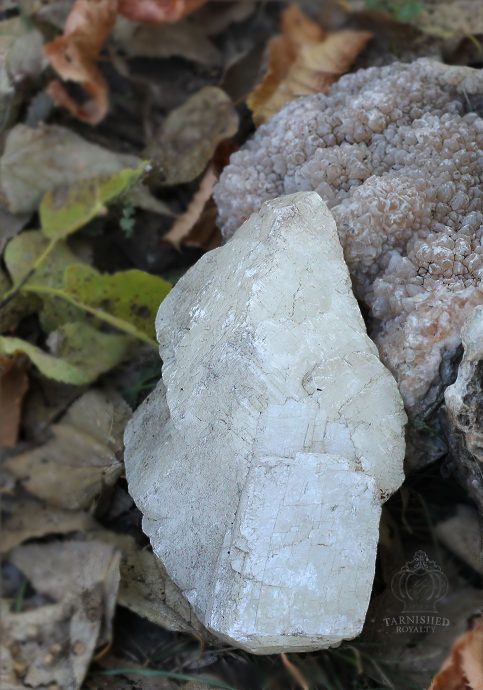
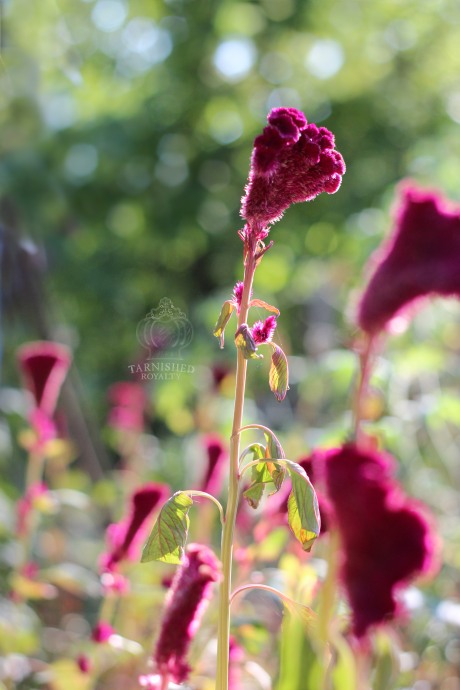
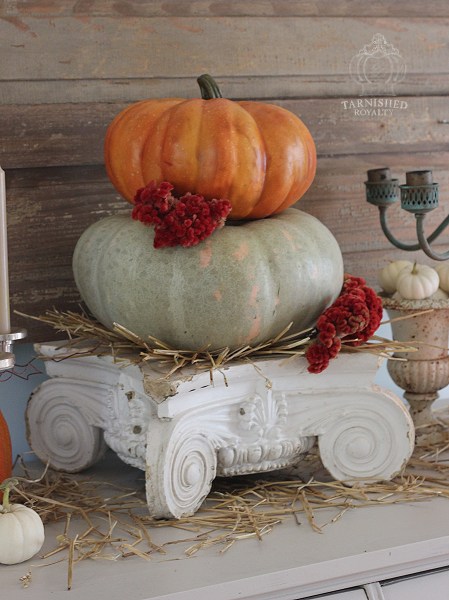
A row of cockscomb whose growth was stunted.
autumn_cockscomb_6

And a more impressive cockscomb blossom from another patch that gets more sun.
autumn_cockscomb_9
We have had some that get as large as cauliflower heads. The saturated color amazes me every year. I showed you how I used some of last year’s harvest in an arrangement on my buffet. You can see how well they hold their color. They go from deep magenta to red to peachy orange and finally to pale blush. You can see the different shades on another arrangement I put together using stems from a few years ago.

Thank you for taking my autumn nature walk!

signature_2015

Share Button

Pumpkins, Verdigris and A Little Bird Told Me

Ahhh fall. Such a bittersweet season with its glorious beauty and wonderful traditions only to be followed by the harsh reality of winter. But today I’m all about the visual appeal of my very favorite time of year.

In a recent post I shared a vignette using Baby Boo pumpkins from our garden, displayed in a soft, neutral setting. Today I’m combining them with bright orange pumpkins, a verdigris candelabra and rich red cockscomb to create a display full of vibrant fall color.

baby_boo_pumpkins_vignette_11

baby_boo_pumpkins_vignette_13

There is an open area between my breakfast nook and my desk and dining room. On the wall that is shared by both rooms sits one of two buffets that provide the settings for me to decorate whenever the season or the whim dictates a change.

baby_boo_pumpkins_vignette_5
In the above photo, the breakfast nook is to the left and my desk / dining room is to the right. I’ll show you more of that area in a future post.

baby_boo_pumpkins_vignette_2

baby_boo_pumpkins_vignette_8

This candelabra is a piece I created by marrying a lamp base, a metal cherub from another piece and an old chandelier. I gave the whole thing a verdigris patina using a paste wax.

baby_boo_pumpkins_vignette_3

For balance, on the other side of the buffet I placed a silver candelabra. I didn’t have five of the same color candle so mix and match came to the rescue.

baby_boo_pumpkins_vignette_9

I tucked dried cockscomb from last year’s harvest between the pumpkins for another pop of color.

baby_boo_pumpkins_vignette_12

I was lucky enough to find the green pumpkin for $3 at Walmart and I spent $8 on the delicious smelling candle for a grand total of $11. Using things I already had, things we grew and a couple of faux pumpkins meant I didn’t have to spend a lot to achieve a new look.

baby_boo_pumpkins_vignette

I have one more Baby Boo vignette to show you next week. It’s a table centerpiece styled with softer colors. And now for my weekly tip.

a_little_bird_told_me_sign
shelf_liner_dashboard_test
It really works!!!

 
signature_2015

Linking with: Have a Daily Cup of Mrs. Olson,The Scoop, Mod Vintage Life, Between Naps on the Porch, From My Front Porch to Yours, Cozy Little House, A Stroll Thru LifeIvy and Elephants, Common Ground, Shabby Art Boutique, French Country Cottage, Amaze Me Monday , VMG206, That DIY Party, Funky Junk Interiors , Savvy Southern Style

Share Button