For the past five years at least, my husband has planted baby boo pumpkins for me. We plant a small variety of other food-bearing plants and also some flowers from seed. Some of them come and go but the three that remain regulars in our garden are baby boos, tomatoes and cockscomb. One year we didn’t plant them and summer and fall just weren’t the same.
I adore pumpkins! I love all shapes and sizes, from Baby Boos, to Cinderella, to Blue Moon to Fairytale. I am obsessed with their form and love to use them in my fall displays, and the more the better. The cost to create a substantial vignette can add up really fast but a packet of seeds is only pennies. Even though my husband does the work of planting them, I have helped in the past and their really isn’t that much to it. If you have a small patch of ground that you aren’t using you can plant the seeds in the spring and just ninety days later you can harvest 60-100 baby boos from one packet of seeds.
They take up a smaller plot of land than other varieties. That’s one of the things I love about them.
We have close to fifty boos that are about ready to be picked. I’ll leave a lot of them on the vine for a couple more weeks but went ahead and picked a few now so I could get a start on my vignettes.
They’re just so cute. It’s impossible to have too many. I’ll share more boo vignettes as we get further into fall.
Next week I’ll share part 2 of my Farmhouse Kitchen Reveal. I hope you have a wonderful weekend. I’ll be enjoying an outdoor concert by the band Boston. Woohoo!
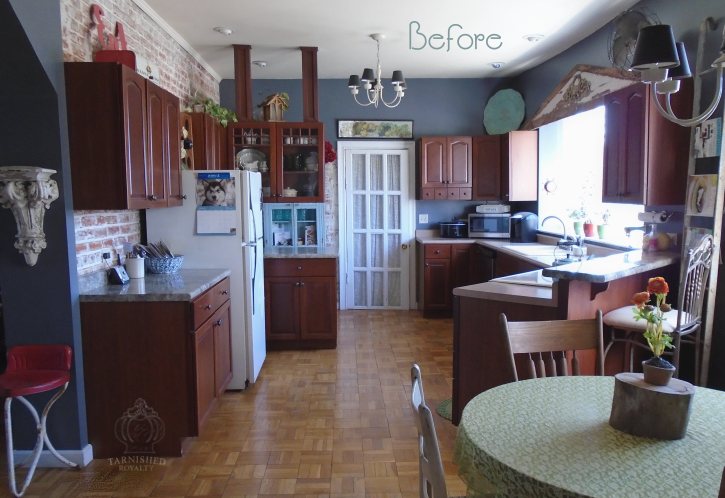
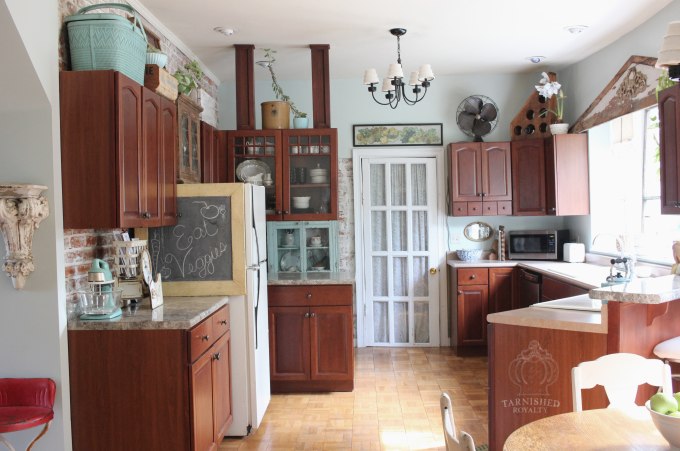
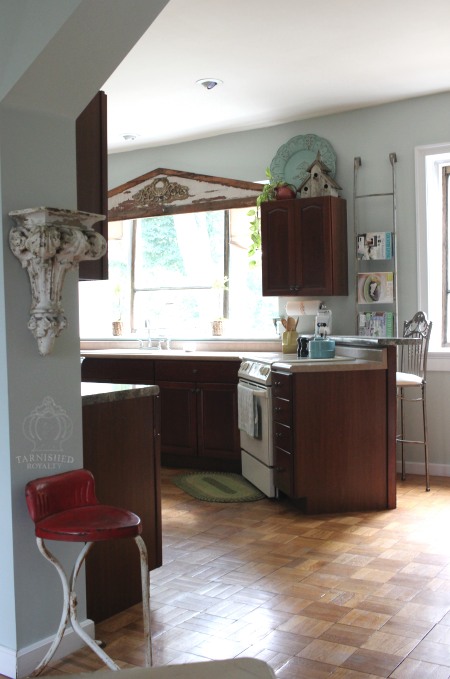
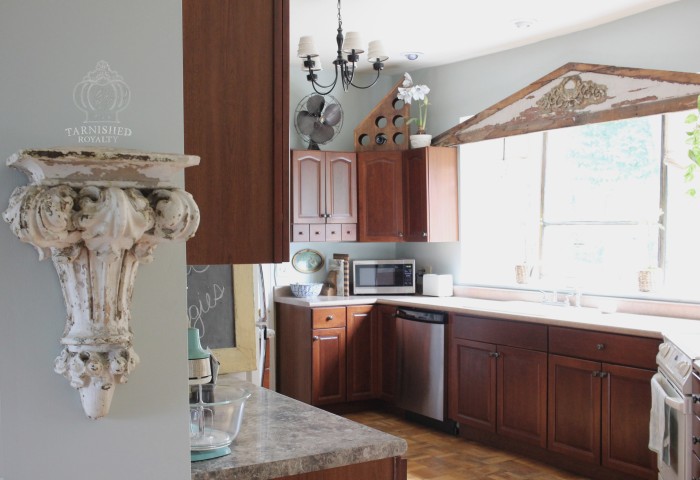
Hello! Happy start of a brand new week! I’m very excited to finally be sharing the reveal of my farmhouse kitchen makeover. I have a lot to show you so I’m going to break it down into 2 or 3 posts to avoid photo overload.
Here we go!
And after… The first thing we did was give it a fresh coat of paint. We used Benjamin Moore Crystalline, the same color we used in the breakfast nook.
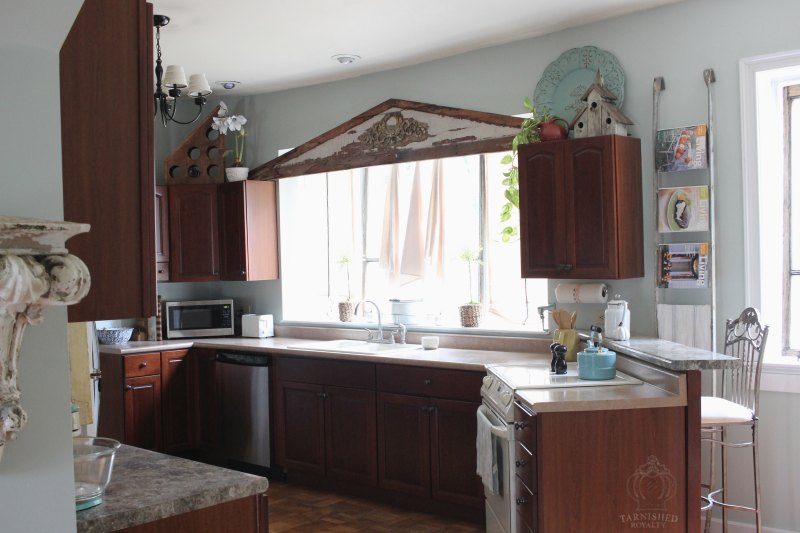
While my husband painted I got busy on my window treatments.
Fifteen years ago when we replaced our tiny little kitchen window with this huge window, I was unwilling to cover the view at all. So I have not had any window treatments on it for all that time. The problem is, the window faces west and just about time to prepare dinner the sun is at its brightest / hottest. After pondering what to do to add softness to the window and provide protection from the sun, while not obstructing the view I finally came up with a solution I love.
I wanted something that I could take down completely rather than just push aside. I also wanted to add some rustic elements to the window. Step one was to focus on the center portion of the window. My husband and I stripped the green paint off two big window screens that just happened to fit perfectly in my two windows (one had to have some slight tweaking to the size.) Then I added old hooks from which I would hang fabric that I tea stained.
I can easily hang them at that time of day when the sun is an annoyance, as well as at night if I want privacy. The rest of the time I can hang them on a vintage coat tree in the corner where I keep a few aprons.
Once that issue was solved I started thinking about making Roman shades for the two smaller windows that flank the larger one. I found a great tutorial on making faux relaxed Roman shades using vinyl roller shades as the base. I knew I wanted a grain sack look so once again I tea stained some fabric and then painted on the stripes using painters tape to create straight lines in the widths I wanted them to be.
I can roll them up as high as I want and pull them down to the bottom when I want complete coverage.
I’m so happy with my new window treatments!
The other window in the kitchen / breakfast nook had the same story, so I used the second stripped window frame with added hooks to create a similar look.
And when I don’t need the fabric up I love the bare rustic wood frame propped in the window.
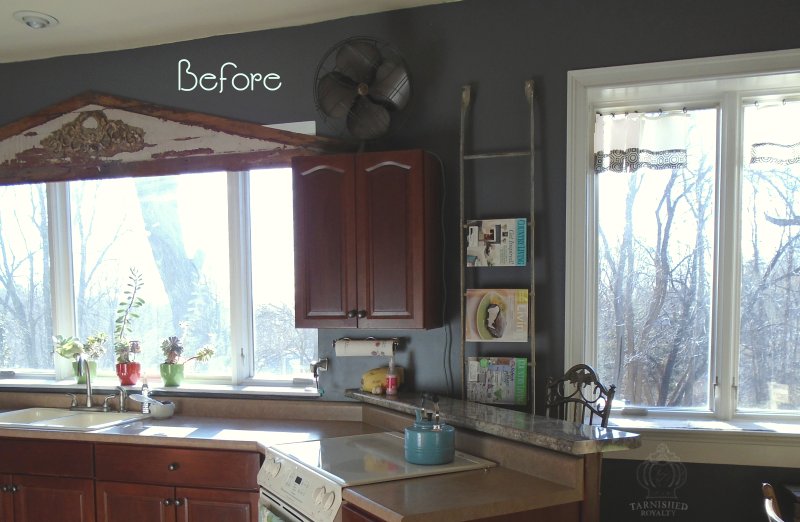
Here’s what it looked like before:
Just a few more shots before I conclude part one of my kitchen makeover.
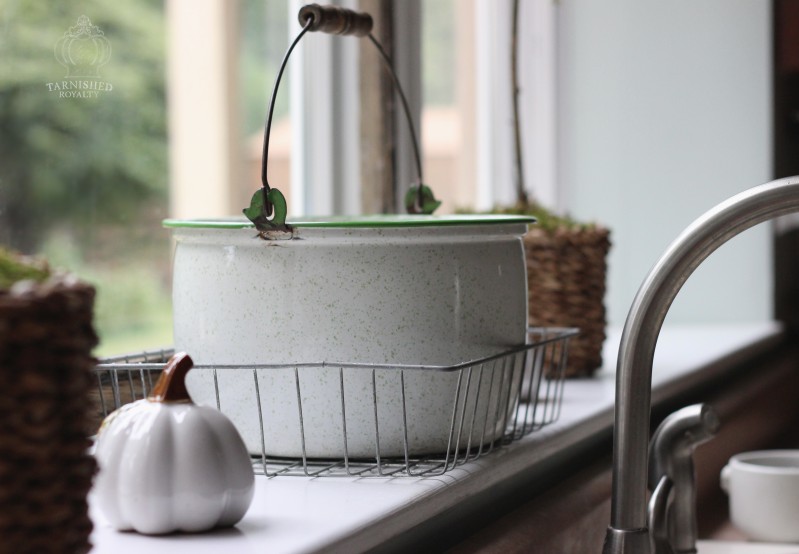
I’ll soon be replacing these glass baby boos with the real thing from my garden.
I thought I’d show you the view from my desk since that is the next area of my home I will reveal in a couple of weeks. This is what I’m looking at as I write you each week.
In part two I’ll show you the other side of the kitchen and some more DIY projects and vignettes.
Thank you so much for allowing me to show you around my kitchen!
The clouds have been taunting me this week. Every time I’ve had the chance to get some photos of my kitchen it’s been one of those days where just when I’m poised to snap the picture the clouds suddenly cover the sun. Oh, and then as soon as I give up the cloud goes away and the sun shines brightly until I’m ready to click again. Arghhhh! After some very frustrating days with the camera I finally got enough decent “after” shots. I’m editing and putting together part one of my kitchen reveal and will post it Monday.
Remember these? This style was overwhelmingly preferred by my readers. But what did I do with them?
You may remember when I shared about my recent garage sale. Well we had 20-30 of these old green windows and window screens of various sizes and shapes. I sold almost all of them but nobody wanted the really large ones and I figured I’d get stuck with them. Well, luckily I did! I had a brainstorm one day while looking at my kitchen windows trying to come up with a plan for window treatments. More on that in the next post, but for now I’ll just say that they came in very handy. Take a look.
Want to see more? Come back on Monday for the bigger picture. Have a great weekend!
Welcome to another Phrase Art Phriday where I share a piece of original photography overlaid with a favorite quote, phrase or thought. As summer winds down I would like to share another picture from my garden.
As much as I adore fall, I am always sad to see summer go. Mostly because of the cold weather that looms ahead but also because all of the beautiful green will soon fade away.
Do you ever have days that feel like you’re spinning your wheels and not accomplishing much? Then all of the sudden one day you feel like you are knocking things out left and right? Those days seem like the most productive days when in fact they are the “flowers of tomorrow” that were produced during the “seed days” of putting in the hard work. Who doesn’t love to see the blooming take place ~ that sense of accomplishment after completing a long, difficult project that turns out better than one imagined? I love that feeling.
But I’ll admit, there are some projects during which I hate the process and when it’s finished I don’t even like want to look at what I’ve created. Sad, right? Whenever you find it difficult to “enjoy the journey” change your approach and remind yourself that you’re in the “seed days”. When you feel like you can’t wait to wrap it up and move on, try to see the mundane task as a precious seed that you’re planting, watering and watching over in order to bring forth the sweet smelling bouquet of accomplishment. Then not only will you have the beautiful flowers, you will be able to remember fondly the time well spent planting the seeds.
Hey! Just popping in to say that I hope you’re having an inspired week! Things always take longer than planned when it comes to DIY. Not surprisingly, I am not quite ready to show the full kitchen reveal. But it really is coming soon! Very soon!
In the meantime, I will show you a very quick peek of one area.
I told you it was quick!
As soon as I finish stocking my coffee station, tidy up my mail center and make my red amaryllis white, I will start snapping pics. I keep seeing other things I want to do to the kitchen, but I’m holding myself to those 3 things! The other ideas can and will be implemented later after I’ve had a chance to live with it for a while.
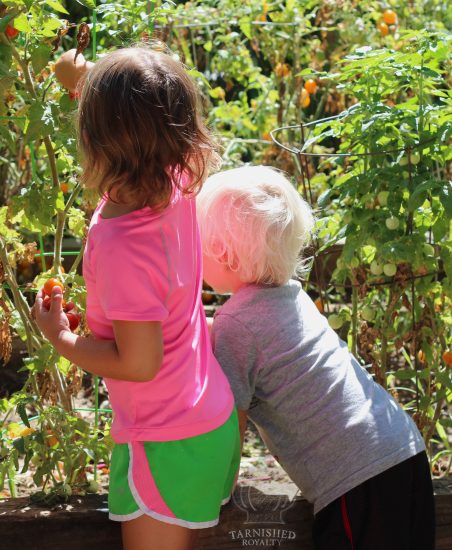
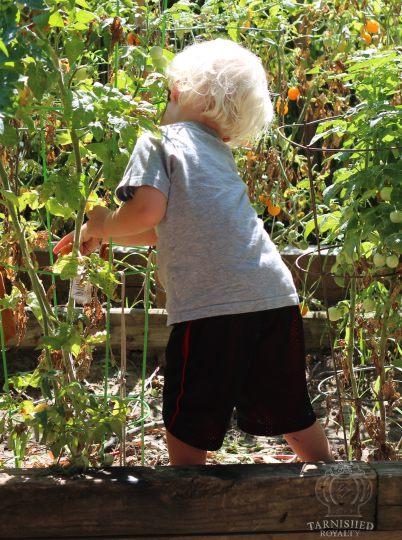
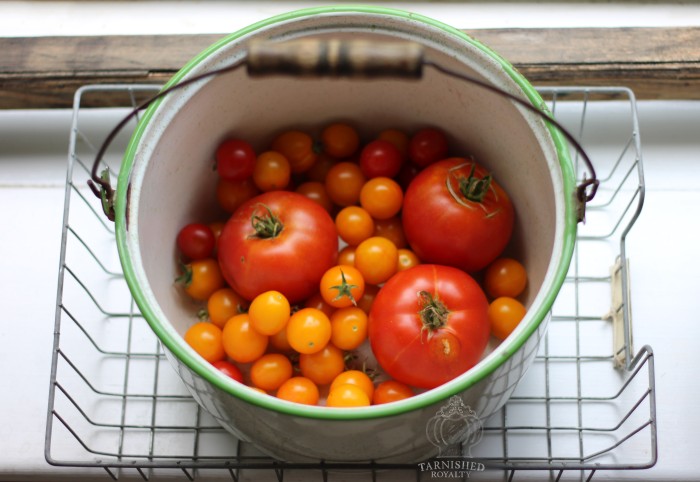
We are in the height of tomato season here and I am reveling in the juicy bounty. I can’t count how many BLT’s I’ve already had and I plan to have many more. Thanks to my husband for planting so many vines we have an abundant harvest and thanks to these little punkins, the tomato picking has been a joy.
Burgers and salad anyone?
I hope you’re enjoying the summer. I’ve been soaking it in and am not ready for it to be over yet. I’ve also been finalizing my kitchen projects. I’ll have a full “before and after” to show you next week.
In the meantime I want to show you one “before”. The charcoal walls are now gone! I can’t wait to show you the new color along with my easy DIY window treatments and lots of other projects and vignettes I have put together to bring in the farmhouse feel I love.