Tag Archives: DIY

Creative Way to Present a Gift Using Bag & Tissue

With Halloween just a few days away and the holidays approaching there will be many opportunities for goodies and gift giving. Today I have a tutorial that will show you a creative way to present a gift. It’s a twist on using a gift bag and tissue.

gift_bag_tissue_pumpkin_2

gift_bag_tissue_pumpkin

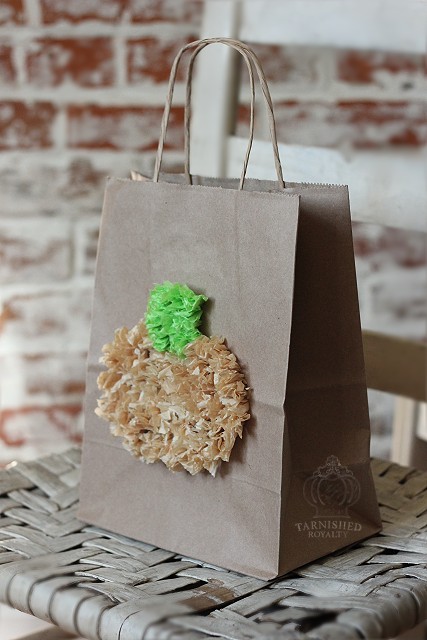
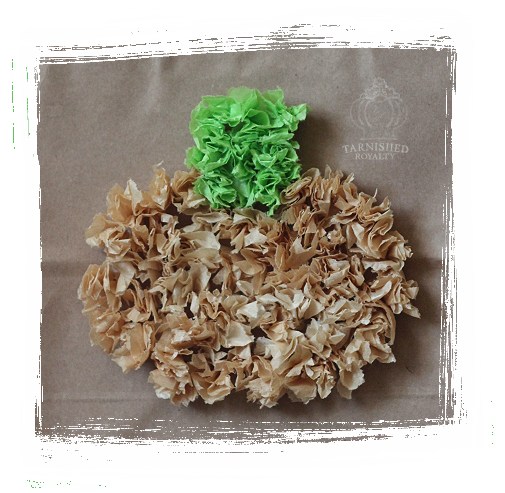
I chose plain brown paper bags but you could use any solid color. My love for baby boo pumpkins inspired me to use tissue in an aged beige color. The pumpkin would be very cute in orange too.

gift_bag_tissue_star_1

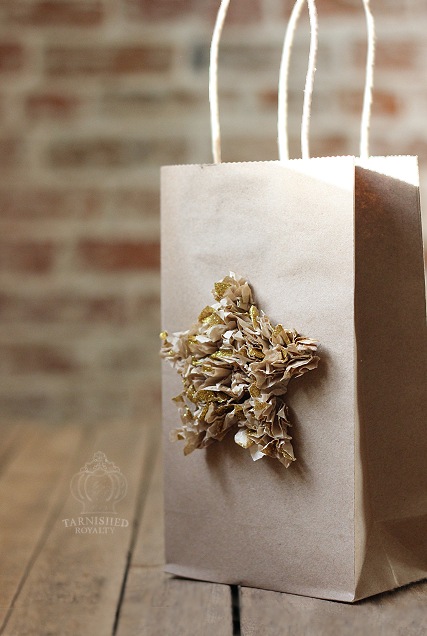
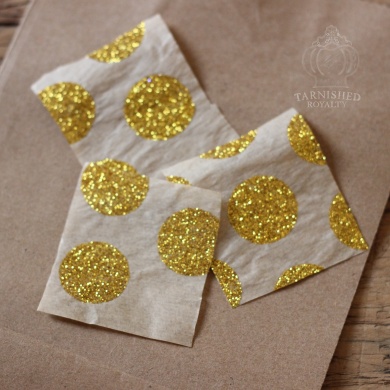
For the star I used a smaller bag. My plan was to use a matte gold tissue paper but the store I went to didn’t have it. They did have this beige and gold glitter paper so I decided to give it a try.

gift_bag_tissue_star_3

Now for the very simple instructions and supply list.

1) Gift Bag
2) Tissue Paper
3) Scissors
4) Glue
5) Pencil

gift_bag_tissue_star_template_small

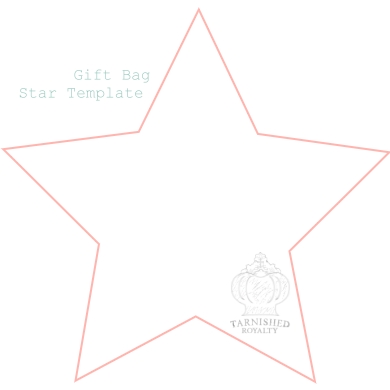
Right click to save the above template to your computer and print it in the desired size

gift_bag_tissue_star_step1

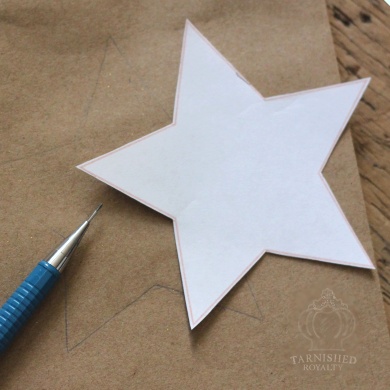
Trace around the star onto the bag

gift_bag_tissue_star_step2 gift_bag_tissue_star_step3

Cut tissue paper into 1 1/2 inch squares. You will need 35-50 depending on the size of your bag, etc. Crumple each square up into a ball and then open back up enough to pinch from the middle and create a sort of pointed blossom.

gift_bag_tissue_star_step4 gift_bag_tissue_star_step5

Begin gluing blossoms in the center of the star, dotting the pointed end with glue and pressing onto bag. It won’t have defined edges during this part of the process but keep the bottom (glued portion) of each blossom within and against the pencil border.

gift_bag_tissue_star_2

Once the glue has dried, define the star shape by pinching, pressing and scrunching the outer edges.
Any simple shape will work and the design could be adapted to fit any occasion.

gift_bag_tissue_pumpkin_template

Here’s the template I used to create the pumpkin bag.
Feel free to use, pin and share!
Happy creating!

This week’s tip for A Little Bird Told Me is on a subject I loathe ~ cleaning.

a_little_bird_told_me_sign
oven_cleaner_b oven_cleaner_part_2

This is how I clean my oven door and it works beautifully!
signature_2015

Linking with: Have a Daily Cup of Mrs. Olson,The Scoop, Between Naps on the Porch, From My Front Porch to Yours, Cozy Little House, A Stroll Thru LifeIvy and Elephants, Shabby Art Boutique, French Country Cottage, Amaze Me Monday, VMG206, That DIY Party, Funky Junk Interiors, Savvy Southern Style, The Charm of Home, Vintage Charm

Share Button

Farmhouse Dining Room Reveal

I decided to show you the dining room reveal while it’s arrayed in its fall glory. Along with all the other rooms downstairs, the dining room got a couple of coats of Benjamin Moore Crystalline to brighten it up and bring more cohesion between rooms.

dining_room_all_3

It was previously (and for several years) this pumpkin color.

dining_room_before_3

A little bit different now, huh?

dining_room_all_4

The change I was most eager to make was to move the chippy old hutch
off the top of the corner buffet…

dining_room_before_2

and place it on top of the longer, more suitable white buffet.

dining_room_hutch_2

dining_room_hutch

I love it in its new home. Along with moving it, I purged the brown transferware,
leaving only shades of white ironstone.

dining_room_hutch_5

The architectural header made the perfect topper and a day at the orchard last week
yielded my ever favorite bittersweet.

dining_room_hutch_3

dining_room_sconce_4

dining_room_sconce_2

I flanked the hutch with a pair of Italian sconces. I love their elegance in juxtaposition with the rustic farmhouse hutch. The sconces are each located right next to a window so their dripping prisms really sparkle on sunny days. When I show you my entry hall you will see
where the sconces previously hung.

dining_room_before

dining_room_table_rooster

I love how much lighter everything feels now. One of the things I still want to do is make over the dark trestle table and chairs. That will have to be a 2016 project.

At the opposite end of the room sits my desk. I will show you what I did to make that area so much more appealing in part 2.

This week in “A Little Bird Told Me” I am sharing a tiny tip that made a huge difference in my life.

a_little_bird_told_me_sign
migraine_fix
Anyone who suffers from debilitating migraines should really give this a try!

Linking with: Have a Daily Cup of Mrs. Olson,The Scoop, Between Naps on the Porch, From My Front Porch to Yours, Cozy Little House, A Stroll Thru LifeIvy and Elephants, Common Ground, Shabby Art Boutique, French Country Cottage, Amaze Me Monday, VMG206, That DIY Party, Funky Junk Interiors, Savvy Southern Style, The Charm of Home, Vintage Charm

Share Button

Sugarplum Festival + A Little Bird Told Me

In case you were thinking that I’m ready to start talking about Christmas, I’m so not! I do however want to let you know about an event that I’ll be selling at. Sugarplum Festival is St. Joseph, Missouri’s annual kick off to the holiday season held at the Albrecht Kemper Museum of Art.

sugarplum_festival_promo
Great shopping, a “Deck the Halls” auction, wine tasting and a lunch café will get shoppers going on their lists for gifts and décor. I will be selling my jewelry and a few other goodies including these wood slice ornaments.

ornament_wood_slice_sugarplum_festival
I may be back later with a tutorial on these ornaments.

And now it’s time for A Little Bird Told Me where I share a weekly tip from my own bag of tricks.

a_little_bird_told_me_sign
snack_binge_test
You’ll save many a calorie this way!

signature_2015

Share Button

DIY Rolling Pedestal Stand

In Part 2 of my farmhouse kitchen reveal I showed you a rolling pedestal stand that I made to display coffee cups on. It is part of my coffee station I keep on the kitchen counter and it also makes a great serving tray. The antique casters give it an industrial feel that I love.

farmhouse_kitchen_reno_after_18
rolling_pedestal_stand_1
Hot cider season is coming!! With the changing seasons, I changed out the springy green pillow in my breakfast nook for this vintage crochet pillow in fall hues.

rolling_pedestal_stand_pillows
Back to the rolling pedestal stand. Today I want to share with you how I put it all together.
Here’s what you’ll need:

2 9″ plywood circles (found at craft and hobby stores)
Caning strips
White paint
Metal candlestick or other base with “legs”
3 small casters
E-6000 adhesive
Tacky Glue

rolling_pedestal_stand_step_1
Starting with a metal candle stand, I removed the center plate from it and
flipped it over on its other end.

I used 2 9 inch plywood circles that I painted white. I doubled them up
to give more thickness and stability.
pedestal_tray_on_casters_step
Next I used some caning that I’ve been keeping in my craft closet for the right project.

pedestal_tray_on_casters
I cut and glued 12 vertical 1 3/4 inch strips
and a horizontal strip around the circumference of the plywood circles using Tacky Glue.

rolling_pedestal_stand_step_4I then glued a strip around the top to complete the border, securing it with clamps until dry.

rolling_pedestal_stand_step
I used my Drimmel to cut the posts off 3 casters.

rolling_pedestal_stand_step_2
Then I used E-6000 to glue the casters to the “legs” of the candlestick,
again securing with clamps until the glue was dry.

rolling_pedestal_stand_step_3

Once the glue on the casters was dry I flipped the base over and glued the tray on top with E-6000.
rolling_pedestal_stand_2
Cheers!
signature_2015

Linking with: Have a Daily Cup of Mrs. Olson,The Scoop, Mod Vintage Life, Between Naps on the Porch, From My Front Porch to Yours, Cozy Little House, A Stroll Thru LifeIvy and Elephants, Common Ground, Shabby Art Boutique, French Country Cottage, Amaze Me Monday , VMG206, That DIY Party, Funky Junk Interiors

Share Button

Farmhouse Kitchen Reveal

Hello! Happy start of a brand new week! I’m very excited to finally be sharing the reveal of my farmhouse kitchen makeover. I have a lot to show you so I’m going to break it down into 2 or 3 posts to avoid photo overload.

Here we go!

farmhouse_kitchen_reno_before_1e

And after…
farmhouse_kitchen_reno_after_1b
The first thing we did was give it a fresh coat of paint. We used Benjamin Moore Crystalline, the same color we used in the breakfast nook.

farmhouse_kitchen_reno_after_28

farmhouse_kitchen_reno_after_4b
While my husband painted I got busy on my window treatments.

farmhouse_kitchen_reno_before_6b
Fifteen years ago when we replaced our tiny little kitchen window with this huge window, I was unwilling to cover the view at all. So I have not had any window treatments on it for all that time. The problem is, the window faces west and just about time to prepare dinner the sun is at its brightest / hottest. After pondering what to do to add softness to the window and provide protection from the sun, while not obstructing the view I finally came up with a solution I love.

farmhouse_kitchen_reno_after_6

I wanted something that I could take down completely rather than just push aside. I also wanted to add some rustic elements to the window. Step one was to focus on the center portion of the window. My husband and I stripped the green paint off two big window screens that just happened to fit perfectly in my two windows (one had to have some slight tweaking to the size.) Then I added old hooks from which I would hang fabric that I tea stained.

farmhouse_kitchen_reno_after_5
I can easily hang them at that time of day when the sun is an annoyance, as well as at night if I want privacy. The rest of the time I can hang them on a vintage coat tree in the corner where I keep a few aprons.

Once that issue was solved I started thinking about making Roman shades for the two smaller windows that flank the larger one. I found a great tutorial on making faux relaxed Roman shades using vinyl roller shades as the base. I knew I wanted a grain sack look so once again I tea stained some fabric and then painted on the stripes using painters tape to create straight lines in the widths I wanted them to be.

farmhouse_kitchen_reno_after_14

I can roll them up as high as I want and pull them down to the bottom when I want complete coverage.

farmhouse_kitchen_reno_after_13
I’m so happy with my new window treatments!

The other window in the kitchen / breakfast nook had the same story, so I used the second stripped window frame with added hooks to create a similar look.

farmhouse_kitchen_reno_after_16
And when I don’t need the fabric up I love the bare rustic wood frame propped in the window.

farmhouse_kitchen_reno_after_29

Here’s what it looked like before:
farmhouse_kitchen_reno_before_4

farmhouse_kitchen_reno_after_wreath

Just a few more shots before I conclude part one of my kitchen makeover.

farmhouse_kitchen_reno_after_12

farmhouse_kitchen_reno_after_7
I’ll soon be replacing these glass baby boos with the real thing from my garden.

farmhouse_kitchen_reno_after_23

I thought I’d show you the view from my desk since that is the next area of my home I will reveal in a couple of weeks.
farmhouse_kitchen_reno_after_25
This is what I’m looking at as I write you each week.

farmhouse_kitchen_reno_after_21
In part two I’ll show you the other side of the kitchen and some more DIY projects and vignettes.

Thank you so much for allowing me to show you around my kitchen!

signature_2015

Linking with: Have a Daily Cup of Mrs. Olson,The Scoop, Mod Vintage Life, Between Naps on the Porch, From My Front Porch to Yours, Cozy Little House, A Stroll Thru LifeIvy and Elephants, Common Ground, Shabby Art Boutique, French Country Cottage, Amaze Me Monday , VMG206, That DIY Party, Funky Junk Interiors

Share Button

Cloudy Days and Indoor Photo Shoots

The clouds have been taunting me this week. Every time I’ve had the chance to get some photos of my kitchen it’s been one of those days where just when I’m poised to snap the picture the clouds suddenly cover the sun. Oh, and then as soon as I give up the cloud goes away and the sun shines brightly until I’m ready to click again. Arghhhh! After some very frustrating days with the camera I finally got enough decent “after” shots. I’m editing and putting together part one of my kitchen reveal and will post it Monday.

I do however want to give you a peek at the project I shared with you when I asked for help deciding on which hooks to use.

Remember these?
farmhouse_kitchen_hooks_2
This style was overwhelmingly preferred by my readers. But what did I do with them?

farmhouse_kitchen_reno_before_screens
You may remember when I shared about my recent garage sale. Well we had 20-30 of these old green windows and window screens of various sizes and shapes. I sold almost all of them but nobody wanted the really large ones and I figured I’d get stuck with them. Well, luckily I did! I had a brainstorm one day while looking at my kitchen windows trying to come up with a plan for window treatments. More on that in the next post, but for now I’ll just say that they came in very handy. Take a look.

farmhouse_kitchen_reno_after_hooks

Want to see more? Come back on Monday for the bigger picture.
Have a great weekend!

signature_2015

Share Button