A few weeks ago I told you about an amazing opportunity I was given to attend one of Jeanne Oliver’s art retreats in Castle Rock, Colorado. The whole experience was uplifting and inspiring. I think the two things that impressed me most were how comfortable Jeanne made this star-struck girl feel and the quality and character of all the talented women who attended.
We were welcomed with mimosas and croissants while we all mingled and got to know one another.
From the beautiful studio to the art instruction to the lovely people, this getaway exceeded my expectations in every way.
During one of the breaks Jeanne led us on a walk down several of the trails they have created on their property.
I plan on making time and room in the budget some time in the future to attend another event in Jeanne’s Living Studio. I might share a piece or two of art I created while there. In another post. If I get brave enough.
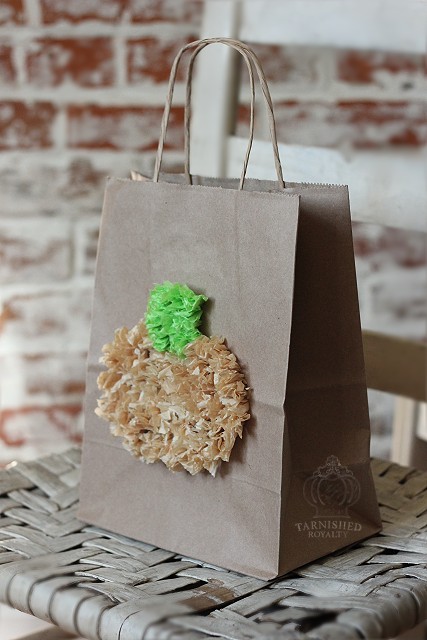
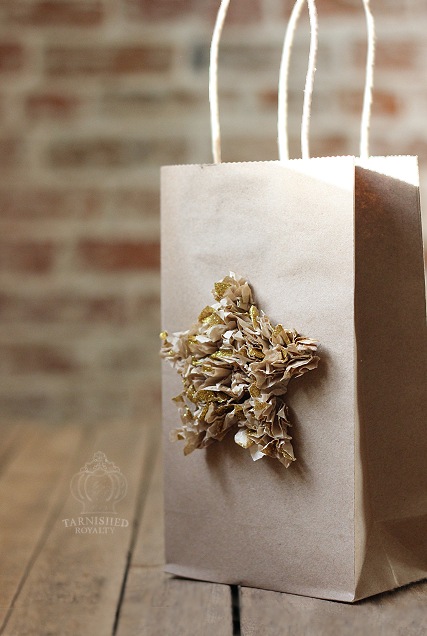
With Halloween just a few days away and the holidays approaching there will be many opportunities for goodies and gift giving. Today I have a tutorial that will show you a creative way to present a gift. It’s a twist on using a gift bag and tissue.
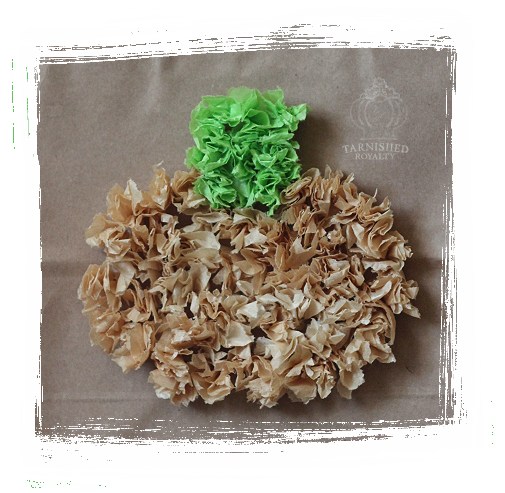
I chose plain brown paper bags but you could use any solid color. My love for baby boo pumpkins inspired me to use tissue in an aged beige color. The pumpkin would be very cute in orange too.
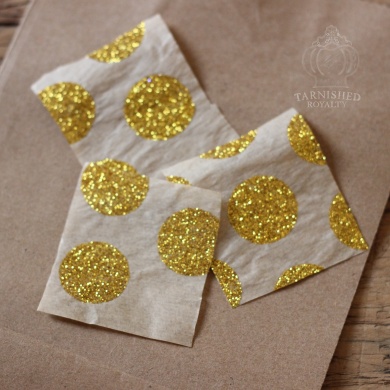
For the star I used a smaller bag. My plan was to use a matte gold tissue paper but the store I went to didn’t have it. They did have this beige and gold glitter paper so I decided to give it a try.
Now for the very simple instructions and supply list.
1) Gift Bag
2) Tissue Paper
3) Scissors
4) Glue
5) Pencil
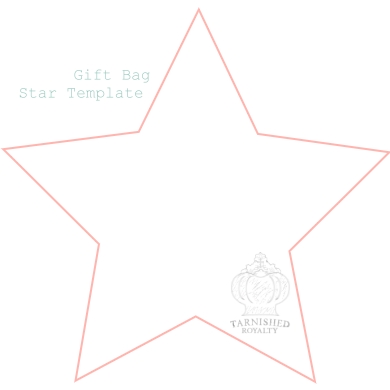
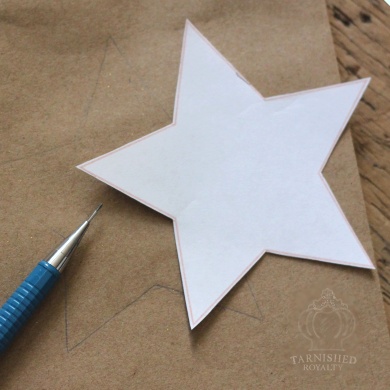
Right click to save the above template to your computer and print it in the desired size
Trace around the star onto the bag
Cut tissue paper into 1 1/2 inch squares. You will need 35-50 depending on the size of your bag, etc. Crumple each square up into a ball and then open back up enough to pinch from the middle and create a sort of pointed blossom.
Begin gluing blossoms in the center of the star, dotting the pointed end with glue and pressing onto bag. It won’t have defined edges during this part of the process but keep the bottom (glued portion) of each blossom within and against the pencil border.
Once the glue has dried, define the star shape by pinching, pressing and scrunching the outer edges.
Any simple shape will work and the design could be adapted to fit any occasion.
Here’s the template I used to create the pumpkin bag.
Feel free to use, pin and share!
Happy creating!
This week’s tip for A Little Bird Told Me is on a subject I loathe ~ cleaning.
This is how I clean my oven door and it works beautifully!
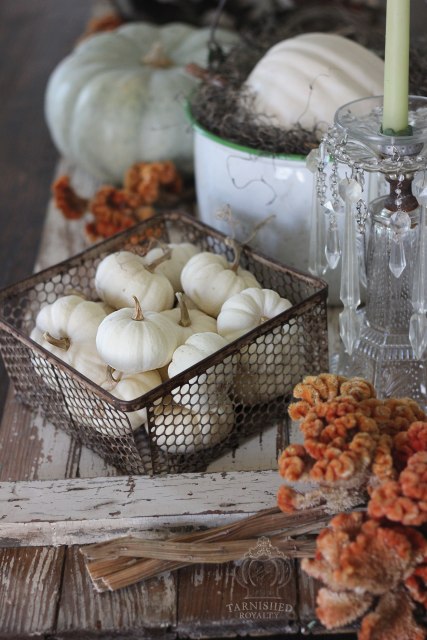
I’m a big believer in using and repurposing what I have to create a whole new look with each new season. Storage can become an issue if one buys new things every season, not to mention the fact that it’s not a budget friendly way to decorate. But that’s only part of it.
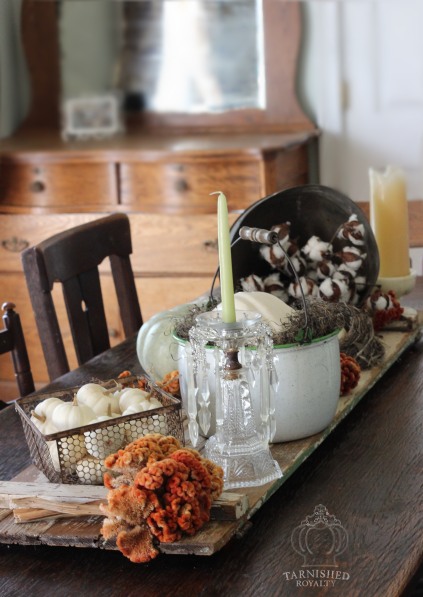
I find that the challenge to make do with things on hand causes me to be much more creative. For my dining room table I got out an old half door that I sometimes use as a vertical backdrop.
Inspired by Stone Gable’s centerpiece found at her lovely fall home tour,
I decided to use it horizontally on the table as the base for my fall vignette.
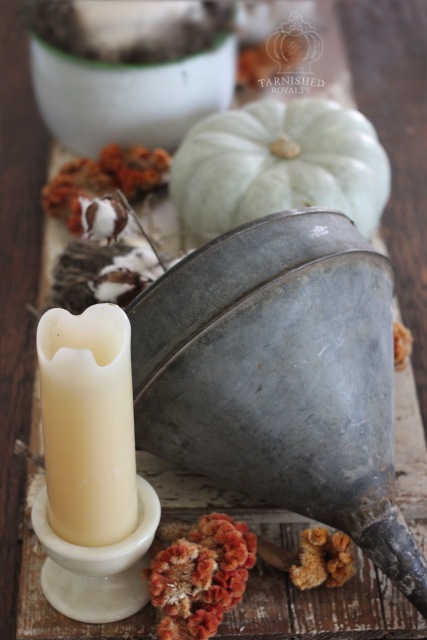
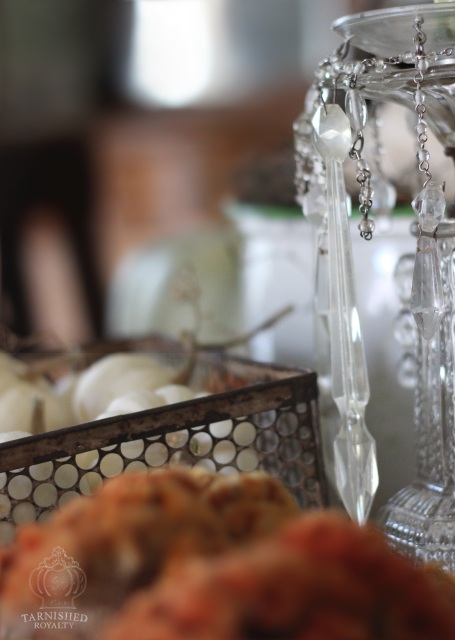
One of the keys to making one-of-a-kind vignettes is to have plenty of unique containers that can be swapped out from room to room. I like to have a mix of new and vintage. The metal basket that now holds baby boos was previously filled with candles in the bathroom. I borrowed the granite ware bucket from my kitchen window.
This big old funnel has held baby boos in past years, so this year I filled it with
cotton stems for an entirely different look.
A little unexpected sparkle among all the rustic elements.
A nest makes an appearance in every season at my house. If you missed my two other baby-boo-inspired looks, you can see the fall neutrals here and the vibrant fall color display here.
Thank you for coming by!
In case you were thinking that I’m ready to start talking about Christmas, I’m so not! I do however want to let you know about an event that I’ll be selling at. Sugarplum Festival is St. Joseph, Missouri’s annual kick off to the holiday season held at the Albrecht Kemper Museum of Art.
Great shopping, a “Deck the Halls” auction, wine tasting and a lunch café will get shoppers going on their lists for gifts and décor. I will be selling my jewelry and a few other goodies including these wood slice ornaments.
I may be back later with a tutorial on these ornaments.
And now it’s time for A Little Bird Told Me where I share a weekly tip from my own bag of tricks.
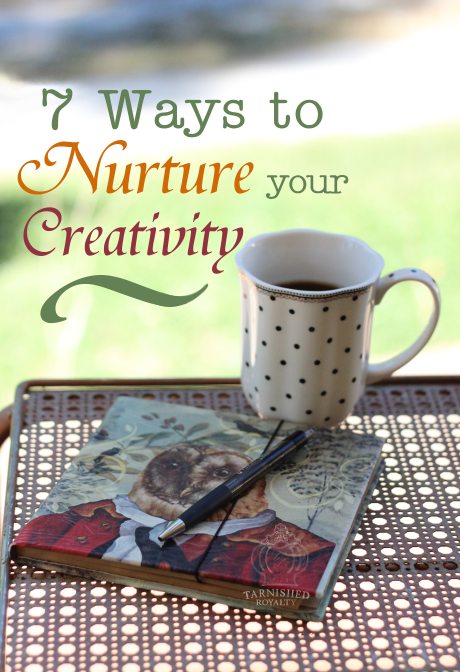
Don’t you love it when you have a surge of creativity and you know that all you want to do is create something beautiful? Do you ever have days (or weeks) where you feel you’ve lost your creative edge? I certainly go through dry spells and wonder where on earth my creativity has gone. On those days I have a few tricks that I find helpful in shaking it off and getting the juices going strong again.
Today I’m going to share 7 tips that have helped me and might help you if you give them a try.
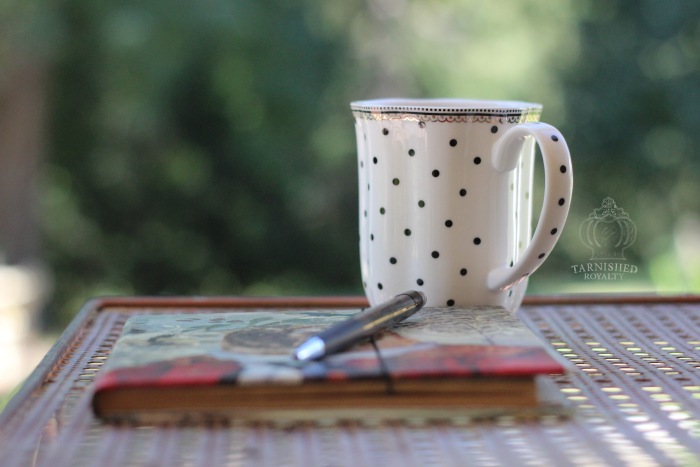
1) Sit outside with a cup of coffee or glass of wine, a notebook and no agenda. Drink in the beauty of nature and allow yourself to be inspired. Write down any creative thoughts you have but don’t feel pressured to think of any.
2) Walk through a fabric store and experience the different textures and colors. This always stirs up my imagination whether I’m planning to work with fabric, another material or even if I have no clue what I’ll do next.
3) Watch an episode of Project Runway, Cake Boss or Flea Market Flip with the volume muted. You’ll be amazed at how freely your own thoughts flow when their conversations aren’t influencing your thoughts.
4) Read. The Bible and devotional books are full of artistic imagery. Jesus Calling is the devotional I am currently using and loving. When I spend time in the presence of the One who created me, I never fail to feel a fresh infusion of creativity.
5) Go to a public place and people watch. Observe the way they dress, the way they interact, their hairstyles, their smiles, the way they laugh. Humans are creative beings and their passion can be contagious.
6) Light a candle and listen to classical music. I love Vivaldi. I somehow feel like more is possible as I thrill to the sounds of the maestros.
7) Take a walk with your camera. Use your artistic eye to find and take shots of things you find interesting. Don’t worry about whether you’ll want to keep or use the photos, just snap freely. This unleashes my creativity every time.
What do you do when you’ve lost your mojo? I’d love to hear your tricks! Share what works for you in the comments and you might help someone else out of their slump!
In Part 2 of my farmhouse kitchen reveal I showed you a rolling pedestal stand that I made to display coffee cups on. It is part of my coffee station I keep on the kitchen counter and it also makes a great serving tray. The antique casters give it an industrial feel that I love.
Hot cider season is coming!! With the changing seasons, I changed out the springy green pillow in my breakfast nook for this vintage crochet pillow in fall hues.
Back to the rolling pedestal stand. Today I want to share with you how I put it all together.
Here’s what you’ll need:
2 9″ plywood circles (found at craft and hobby stores)
Caning strips
White paint
Metal candlestick or other base with “legs”
3 small casters
E-6000 adhesive
Tacky Glue
Starting with a metal candle stand, I removed the center plate from it and
flipped it over on its other end.
I used 2 9 inch plywood circles that I painted white. I doubled them up
to give more thickness and stability.
Next I used some caning that I’ve been keeping in my craft closet for the right project.
I cut and glued 12 vertical 1 3/4 inch strips
and a horizontal strip around the circumference of the plywood circles using Tacky Glue.
I then glued a strip around the top to complete the border, securing it with clamps until dry.
I used my Drimmel to cut the posts off 3 casters.
Then I used E-6000 to glue the casters to the “legs” of the candlestick,
again securing with clamps until the glue was dry.
Once the glue on the casters was dry I flipped the base over and glued the tray on top with E-6000.
Cheers!


 I then glued a strip around the top to complete the border, securing it with clamps until dry.


