Category Archives: Tutorials

Girls Want Pearls #51: Eyeglass Lanyard

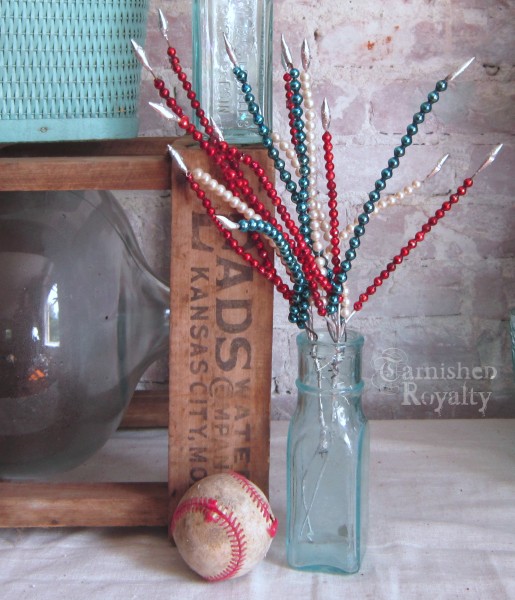
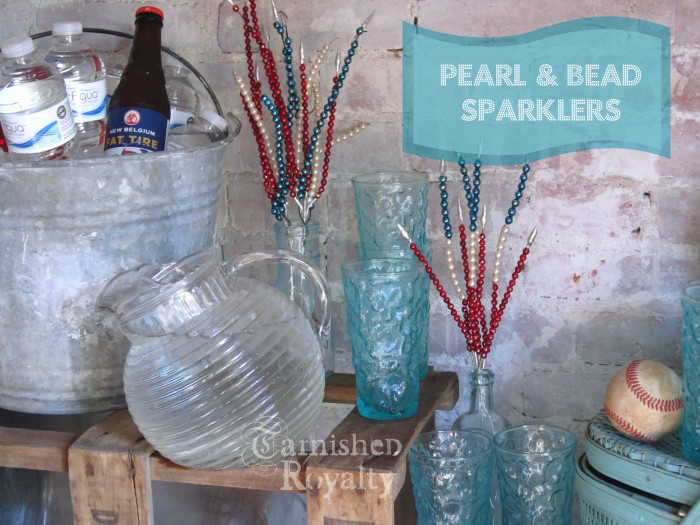
Welcome to Girls Want Pearls #51, where every Monday for 52 weeks we take a look at pearls, their role in history and fashion and how we can repurpose them in our wardrobe and home. Only 1 more week left in the series after today! But I have many more fun things in store for the creative soul on my blog in the next year. Today we’ll be making an eyeglass lanyard for your reading glasses or sunglasses.

eyeglass_lanyard_2
I don’t know about you, but I like to have my reading glasses and my sunglasses right at my fingertips. I’ve been wanting something to wear around my neck to keep them handy for some time, and finally decided to make myself an eyeglass lanyard. It’s a quick project, and no jewelry making skills required!

Here’s what you’ll need:
eyeglass_lanyard_step1b

  • Start by threading a needle with approx. 12 inches of doubled thread or beading wire, knotted on the end.
  • Cut 3 pieces of lace into the following lengths: 3 inches; 3 inches; 12 inches. The width can be whatever you want it to be ~ mine are approx. 1/2 inch wide.

eyeglass_lanyard_step2

  • Tie a knot in one end of each small piece of lace, and in both ends of the large piece of lace.
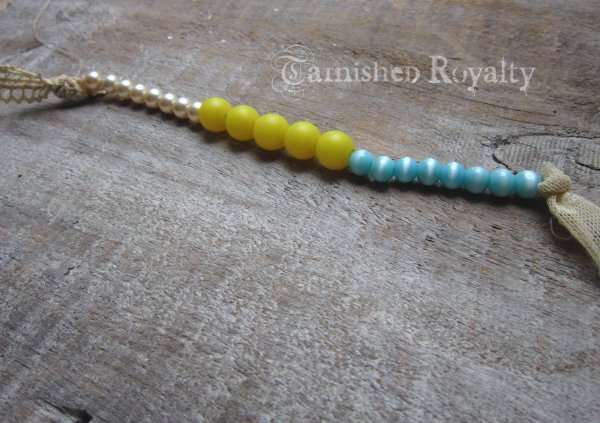
  • Take the needle and thread and stitch through the knot in one of the small pieces, making 3 or 4 stitches, then begin adding beads.

eyeglass_lanyard_step3
The first section, from start of lace to end of beads should be approx. 11 inches.
eyeglass_lanyard_step4

Now it’s time to connect the completed section to the large piece of lace.
eyeglass_lanyard_step5

  • Stitch through the knot in one end of the large piece of lace, making a few stitches and tying off the thread.
  • Rethread the needle with another 12 inches doubled and knotted on the end.
  • Stitch through the knot on the other end of the large piece of lace, making 3 or 4 stitches, then add beads and the final small piece of lace to create another 11 inch section.

You’re almost done now, there’s just one more step.
The final step is to add the piece that will hold your glasses. You have a choice to make here. You can either add a ring, and hang your glasses on like this…
eyeglass_lanyard_1
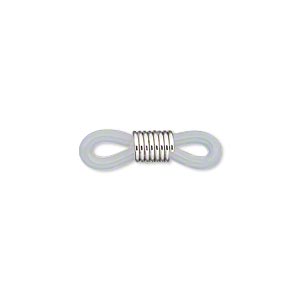
Or you can add looped eyeglass findings like these…
Eyeglass-Holders-Rubber-Silver---pa1681fnb
…………………………….source

Or if you’re cheap like me, you can create your own hack by wrapping and stitching thread around a clear hair band.
eyeglass_lanyard_3
eyeglass_lanyard_4
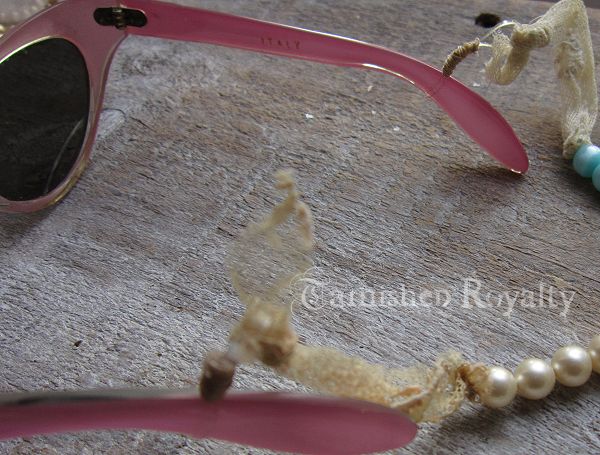
I like the loop style better for days where I’ll be taking my glasses on and off frequently (like when shopping), since they allow for a one-handed method. Either way, you’ll never have to dig in your purse for your glasses, or wonder where you put them.
eyeglass_lanyard_5

Next week’s pearl post hint: Calvary

Love pearls and don’t want to miss any pearly posts?
You can get a reminder, just fill in your info below and I’ll email you when a post goes live and send you a monthly newsletter.
.Subscribe Now
First Name Last Name Email

Talk soon,
 Ann

Linking with: Savvy Southern Style,The 36th Avenue, No Minimalist Here, Have a Daily Cup of Mrs. Olson,The Scoop, Mod Vintage Life, Between Naps on the Porch, From My Front Porch to Yours, Cozy Little House, Knick of Time, A Stroll Thru LifeIvy and Elephants, Jennifer Rizzo, Style Elixir, Shabby Art Boutique, Cheerios and Lattes, Reasons To Skip The Housework, Classy Clutter, French Country Cottage, C.R.A.F.T. Monday Funday , VMG206, Bacon Time with the Hungry Hypo, That DIY Party

Share Button

Girls Want Pearls #50: Paisley Lace and Pearl Lampshade

Happy Summer Monday! Thanks for stopping by for another Girls Want Pearls! I can’t believe this is #50 in my series about pearls and that there are only 2 more left after today! I’m excited about today’s project so let’s get to it! What could be prettier than a Paisley Lace and Pearl Lampshade?

lampshade_1
lampshade_3

Isn’t it fun? I love it on my funny little crooked vintage lamp. I’m pretty sure it’s my favorite pearl project to date. Of course it’s not the first time I’ve thought this. When I made the pearl spider and web back in September it was my favorite.

Then in February when we were all so over winter, these ombre vases were my favorite.

And in March I made a pearl nest which took over the #1 spot in my heart for pearl projects.

The lampshade requires a bit more time than some of the simpler projects but it’s definitely do-able in a day, and definitely worth it.

Ready to make your own Paisley Lace and Pearl Lampshade?
Here’s what you’ll need:
lampshade_step_1
And a printout of this or your own paisley pattern:
Paisley-3
Print the paisley design in a few different sizes (feel free to leave me a comment if you need help with this step).
lampshade_step_2
Cut out the “paisleys.”
lampshade_step_3
Stick them on the lampshade with a glue stick or other glue.
lampshade_step_4
Using a sharp knife, score around the pattern.
lampshade_step_5
Remove the pattern and cut the design into the lampshade. It’s okay if the edges are not smooth ~ the lace will fill in and cover the edges. Cutting tip: It seems to work best if you get the knife in about halfway and keep it there will slowly gliding it around the scored area.
lampshade_step_6
Use the cutouts or the paper pattern to cut your lace. Cut the lace, adding an approx. 1/8 inch border all the way around. Glue the lace to the inside of the shade, making sure to leave some slack in the lace, with the edges of the lace pushed as close to the edge of the cutout as possible so it won’t be visible when the lamp is turned on. Next, move to the outside of the shade and push the excess lace in against the cutout edge, covering the jagged edges.
lampshade_4
Glue pearls on in a few areas, outlining the paisley or dotting the lace with curly cues, mini paisley shapes or circles.
lampshade_2
Let’s light the darkness around us! As always, leave any questions in the comments. Do you have a favorite pearl project from my series? I’d love to hear!

Next week’s pearl post hint: Eye See You

Love pearls and don’t want to miss any pearly posts?
You can get a reminder, just fill in your info below and I’ll email you when a post goes live and send you a monthly newsletter.
.Subscribe Now
First Name Last Name Email

Talk soon,
 Ann

Linking with: Savvy Southern Style,The 36th Avenue, No Minimalist Here, Have a Daily Cup of Mrs. Olson,The Scoop, Mod Vintage Life, Between Naps on the Porch, From My Front Porch to Yours, Cozy Little House, Knick of Time, A Stroll Thru LifeIvy and Elephants, Jennifer Rizzo, Style Elixir, Shabby Art Boutique, Cheerios and Lattes, Reasons To Skip The Housework, Classy Clutter, French Country Cottage, C.R.A.F.T. Monday Funday , VMG206, Bacon Time with the Hungry Hypo, That DIY Party

Share Button

Girls Want Pearls #49: DIY Cutout Top With Pearl Swags

Happy Monday! It’s all about fashion this week on Girls Want Pearls #49. In today’s video tutorial I will show you how to make this cute cutout top with pearl swags.

top cutout

I’ve worn this top once and received so many compliments! If you try it out, I’d love to hear from you.

Next week’s pearl post hint: Light the Darkness

Love pearls and don’t want to miss any pearly posts?
You can get a reminder, just fill in your info below and I’ll email you when a post goes live and send you a monthly newsletter.
.Subscribe Now
First Name Last Name Email

Talk soon,
 Ann

Linking with: Savvy Southern Style,The 36th Avenue, No Minimalist Here, Have a Daily Cup of Mrs. Olson,The Scoop, Mod Vintage Life, Between Naps on the Porch, From My Front Porch to Yours, Cozy Little House, Knick of Time, A Stroll Thru LifeIvy and Elephants, Jennifer Rizzo, Style Elixir, Shabby Art Boutique, Cheerios and Lattes, Reasons To Skip The Housework, Classy Clutter, French Country Cottage, C.R.A.F.T. Monday Funday , VMG206, Bacon Time with the Hungry Hypo, That DIY PartyCasual Friday, I Feel Pretty, Rachel The Hat, Lena B. Actually, Because Shanna Said So, Not Dead Yet Style, Monday Mingle, Remix, Rewear, Restyle

Share Button

Girls Want Pearls #48: Cross and Crown Bookmark

Welcome to Girls Want Pearls #48! Thank you for coming by for another pearl project tutorial. Today I want to show you how to make something that everyone can use ~ a cross and crown bookmark.

bookmark_1
I love crosses and crowns so I decided to incorporate both of those into the design.

bookmark_3

Supply list: Leather belt; 13 4mm pearls; 3 6mm pearls; straight pins;
elastic fabric strip, 11 inches long.
Let’s get started! The next several pictures will show you the how-to:
bookmark_step1a
bookmark_step1b
bookmark_step1
bookmark_step2
bookmark_step3
bookmark_step4
bookmark_step5
bookmark_step6
bookmark_step7
bookmark_step8
bookmark_step9
bookmark_step1f
bookmark_step1ca
bookmark_step1d
bookmark_step1e
bookmark_step1g
bookmark_2
Woo, that was a lot of photos! Creating this post took way longer than creating the actual project! :) And there you have it, a unique and pretty bookmark you can use yourself or give as a gift to your favorite book lover.

Next week’s pearl post hint: I’ve got your back

Love pearls and don’t want to miss any pearly posts?
You can get a reminder, just fill in your info below and I’ll email you when a post goes live and send you a monthly newsletter.
.Subscribe Now
First Name Last Name Email

Talk soon,
 Ann

Linking with: Savvy Southern Style,The 36th Avenue, No Minimalist Here, Have a Daily Cup of Mrs. Olson,The Scoop, Mod Vintage Life, Between Naps on the Porch, From My Front Porch to Yours, Cozy Little House, Knick of Time, A Stroll Thru LifeIvy and Elephants, Jennifer Rizzo, Style Elixir, Shabby Art Boutique, Cheerios and Lattes, Reasons To Skip The Housework, Classy Clutter, French Country Cottage, C.R.A.F.T. Monday Funday , VMG206, Bacon Time with the Hungry Hypo, That DIY Party

Share Button

Girls Want Pearls #46: Business Card Holder

Happy Monday and welcome to Girls Want Pearls #46! Last week’s pearl post hint was “mind your business”. Today I’m going to show you two easy ways to use pearls in creating unique business card holders. Whether you have a brick and mortar shop or take your product on the road doing shows, you need a place to show off your business cards.
business_card_holder_1
business_card_holder_3
business_card_holder_2
A spool of string on pearl feet makes a great business card holder for anyone who sells a creative product.

How to make it:

Using a sharp knife, cut a slot in the side of your cardboard spool, either straight or diagonally, a little bit wider than the business card height, approx. 2 inches. You can make the slot as thick as you like. The one shown is thick enough to hold ten business cards.
business_card_holder_3b
Glue down the stray pieces of string you cut through to keep them in place. In order to keep your business cards up high enough to display thoroughly you can do one of two things. Either fill the slot to capacity with cards to keep them snug, or place stuffing on the inside of the yarn spool to keep the cards elevated.

The second business card holder is simply a shell and pearls.
business_card_holder_4
business_card_holder_5
I had this one around that I have used for a few years to hold my business cards. Someone else had decorated it with pearls and I just added a few more to make it really shine. An easy but pretty business card holder.

Next week’s peal post hint: It’s anybody’s guess

Love pearls and don’t want to miss any pearly posts?
You can get a reminder, just fill in your info below and I’ll email you when a post goes live and send you a monthly newsletter.
.Subscribe Now
First Name Last Name Email

Talk soon,
 Ann

Linking with: Savvy Southern Style,The 36th Avenue, No Minimalist Here, Have a Daily Cup of Mrs. Olson,The Scoop, Mod Vintage Life, Between Naps on the Porch, From My Front Porch to Yours, Cozy Little House, Knick of Time, A Stroll Thru LifeIvy and Elephants, Jennifer Rizzo, Style Elixir, Shabby Art Boutique, Cheerios and Lattes, Reasons To Skip The Housework, Classy Clutter, French Country Cottage, C.R.A.F.T. Monday Funday , VMG206, Bacon Time with the Hungry Hypo, That DIY Party

Share Button

Girls Want Pearls #45: Patriotic Sparkler Sprays

Happy Monday! I hope everyone had a good Father’s Day weekend. Summer is in full swing, with swimming, baseball, bbqs, nights on the patio, lightning bugs…ahhhh. And I’m starting to hear fireworks, a definite sign of summer. Today is #45 in my series, Girls Want Pearls, and I have a patriotic décor project to show you. It’s a play on my previous post here. I’m going to show you how to make Pearl and Bead Sparkler Sprays for your July 4th table or buffet.

sparklers_1
sparklers_5bbr>sparklers_6
The supply list is short: 20 gauge wire, pearls, red beads, blue beads, foil, glitter and glue. I have actually taken vintage mercury bead sprays and modified them but I’ll show you how to make them from scratch.

To create a bouquet of this size (2 sprays):
sparklers_7
Start by cutting 8 pieces of wire, approx. 14 inches in length. Twist 4 pieces of wire together approx. 6 inches from the bottom to form a wire spray. Thread the beads and pearls on, in solid or alternating patterns. Repeat steps to make the second spray.

Cap them at the top with foil using the method shown here:
patriotic_head_band_step_5
sparklers_4b
The above bouquet is 4 sprays.
sparklers_3
That’s it! You can make several sprays and place them as centerpieces or to beautify your buffet table.

Next week’s pearl post hint: Mind your business

Love pearls and don’t want to miss any pearly posts?
You can get a reminder, just fill in your info below and I’ll email you when a post goes live and send you a monthly newsletter.
.Subscribe Now
First Name Last Name Email

Talk soon,
 Ann

Linking with: Savvy Southern Style,The 36th Avenue, No Minimalist Here, Have a Daily Cup of Mrs. Olson,The Scoop, Mod Vintage Life, Between Naps on the Porch, From My Front Porch to Yours, Cozy Little House, Knick of Time, A Stroll Thru LifeIvy and Elephants, Jennifer Rizzo, Style Elixir, Shabby Art Boutique, Cheerios and Lattes, Reasons To Skip The Housework, Classy Clutter, French Country Cottage, C.R.A.F.T. Monday Funday , VMG206, Bacon Time with the Hungry Hypo, That DIY Party

Share Button