Monthly Archives: February 2015

DIY Double Dip Flip: From Dress to Tassel

promo_DIY_Double_Dip_Flip

Welcome to our first ever DIY Double Dip Flip! Heather and I are very excited to share our DIY inspiration with you, born out of our passion for both decor and fashion. For each installment in this series, we’ll start with an inspiration piece from either fashion or decor. Then we will each show you our unique take on how to use the idea on something entirely different in decor or fashion.

Are you ready to see our first inspiration piece?

annabelle_dress_back2
Isn’t this a beautiful dress? The Dress

Here’s how I interpreted the design to make a hanging ball tassel.

tassel_ball_2
Using teal chiffon I created a piece that would show off the floaty feeling of the fabric.I used jute twine to add a rustic contrast to the formal chiffon.

tassel_ball_5
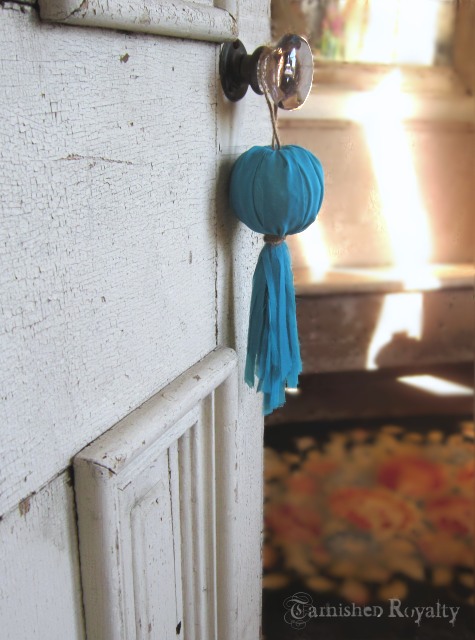
A single tassel can add interest to a doorknob, a chandelier or other hanging light.

Other fun ways to decorate with ball tassels:
v How about a pair used as curtain tie backs?
v A string of tassels hung loosely as a garland on a mantel
v A mix of large and small for fun and different party decorations
v I can see them hanging by the DOZENS in white or ivory for a WEDDING or shower

Of course the color possibilities are endless.

Now for the tutorial portion of the post:
tassel_ball_supplies

STEP 1:
tassel_ball_steps_1
Cut three pieces of fabric, 7 inches wide by 14 inches long each (1/3 yard of fabric was plenty to do one tassel ball).

STEP 2:
tassel_ball_steps_2
Cut strips of varying widths in each piece of fabric, stopping 8 inches in, lengthwise.

STEP 3:
tassel_ball_steps_3
Twist off the tassel portion of each piece of fabric using an elastic hair band or wire (I forgot to show this in the supplies graphic).

STEP 4:
tassel_ball_steps_4
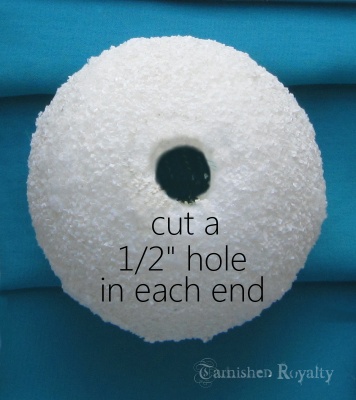
Cut a 1/2 inch hole in each end of a 3 inch Styrofoam ball. The hole doesn’t need to go all the way through, just about a half inch or so.

STEP 5:
tassel_ball_steps_5
Place the ball on the non-strip portion of the first piece of fabric. Bringing the fabric to the top of the ball, twist and tuck the fabric into the hole. Place a drop of glue on a straight pin and push it inside the hole to secure the fabric.

STEP 6:
tassel_ball_steps_6
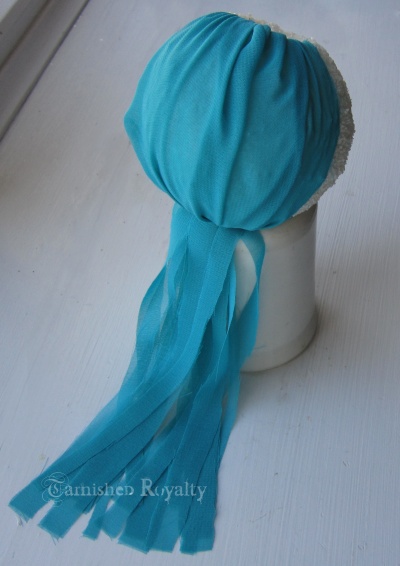
Push the twisted part of the strip portion into the hole in the bottom of the ball. Place a drop of glue on a straight pin and push it inside the hole to secure the fabric.

Repeat steps 5 and 6 with the other two pieces of fabric, slightly overlapping each piece.

STEP 7:
tassel_ball_3
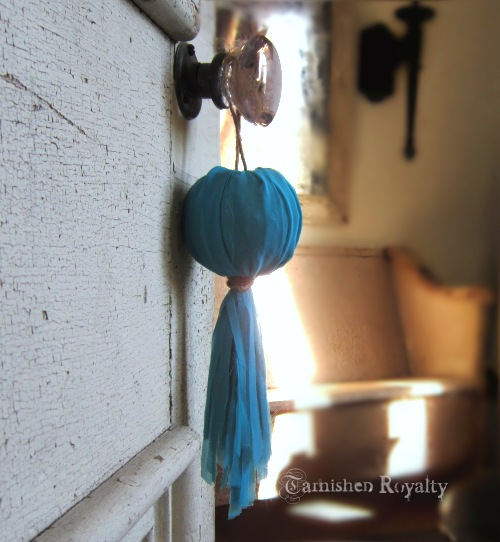
Cut a piece of twine a couple inches longer than you want your hanger to be. Tie the two ends of the twine together to form a knot. Tuck the knot inside the hole at the top of the ball, then dot a straight pin with glue and push into the knot to secure. Repeat with a second pin for extra holding power.

STEP 8:
tassel_ball_1
Cut another piece of twine to wrap around the top of the “fringe.” Wrap the twine around a few times, tie off and tuck the ends in the hole at the bottom of the ball.

Thank you so much for stopping in. Heather has a fantastic project to share with you using the same beautiful dress as her inspiration. She went a totally different direction with hers and I know you’ll love it. Be sure to check out Heather’s flip!

signature

Linking with: Have a Daily Cup of Mrs. Olson,The Scoop, Mod Vintage Life, Between Naps on the Porch, From My Front Porch to Yours, Cozy Little House, A Stroll Thru LifeIvy and Elephants, Style Elixir, Shabby Art Boutique, Reasons To Skip The Housework, Classy Clutter, French Country Cottage, Amaze Me Monday , VMG206, That DIY Party

Share Button

Phrase Art Phriday: Dream

swan_snow

Welcome to the first Phrase Art Phriday of 2015! I started this series last year because it allows me to play with two things I love: photography and graphic design.

I took this photo a few years ago when we received a good snow dump. I think we got about a foot before it was all said and done. The swan planter sat in our back yard next to an old park bench.

I have since sold that swan during one of my major clutter purges. Getting rid of 2 sheds full of junk was a major undertaking. The thought of it felt overwhelming. But the vision of a clutter free space motivated me to take that first step. If your spirit is drooping and you feel snowed under, know that better days are ahead. Look beyond your circumstances and envision something better. Then do one thing to move toward that scenario. I’m rooting for you, you can do it!

I’m happy I have this photo to remember her and that hard winter.

I have one more graphic to show you. I created it to share with you an upcoming series here on my blog.

promo_DIY_Double_Dip_Flip

The first installment will be this Monday. I hope you have a lovely weekend and will come back then!

signature

Share Button

ish

ish …a tiny suffix that has become a cherished part of my vocabulary. What other three letters can you add on to any word in any statement to give you license to exaggerate?

ish_store

Three letters that come in very handy when I’m telling my husband what time I’ll be home from girls’ night out; when I’m explaining how much I’ve spent shopping; when describing the size of my shoe collection; when confessing the number of cookies I ate in one sitting.

ish_times_sign
source
Not sure I would use it when I need to be professional…

Now don’t get me wrong, I am well meaning when I use “ish” and I only use it when I’m truly not exactly sure of the precise measurements in a given situation or to soften the blow when delivering the cold hard facts.

Still, I think I’ll try to cut down on the use of it.

I’ll make it number 20-ish on my to-do list.

signature

Share Button

Cheap, Easy DIY + New Series Announcement

Hey readers! Today I have a cheap, easy DIY project to show you. Now that we’re on the other side of January, it feels like there’s light at the end of the winter tunnel. It’s the perfect time to get out some of those projects that you keep meaning to get to before the really nice weather gets here and all you want to do is play! This project is one that I planned last summer when I was putting the finishing touches on the wine cellar / man cave. Keeping with both the masculine look and the minimal budget, I hunted through yard sales to find some “manly” animal figures. Since I was going to paint them gold and white, I didn’t care how ugly they were. A little paint can do wonders!

deer_eagle_before
Here’s the before picture of a few pieces I came up with. Some plastic deer, one that had flocked “fur” and an eagle cologne bottle.

wine_cellar_after_mantel
How different they look with just a couple of coats of spray paint!

wine_cellar_eagle
I didn’t prime the items, I just roughed them up a tiny bit with sandpaper and sprayed metallic gold paint on some and white on the others. They won’t really be handled, so it should wear fine.

gold_branches_beforeb
And for a really cheap (like free!) but impactful display just gather some branches and spray.

Now I have some exciting news! I’m teaming up with Heather of Woods of Bell Trees for a brand new series all about DIY!

promo_DIY_Double_Dip_Flip
We’re calling it DIY Double Dip Flip. We’ll take our queue from a trending technique in fashion and show you our 2 takes using the same inspiration on a decor piece. And sometimes the decor piece will be our inspiration for some fun DIY twists with fashion.

Our first flip will be this Monday. Stay tuned for a double dip of DIY inspiration!

signature

Share Button